To really take advantage of a lot of the features of Azure you need to start getting used to doing things in PowerShell. You don't have to do this but it will open the door to a lot of things if you do.
Install the Azure PowerShell Module
Open a PowerShell window with Admirative privileges and install the following modules:
Install-Module az
Install-module az.resources
Now we need to do is authenticate to out azure account. For this we use the following command:
Connect-AzAccountWe have to decide what resource group we want to be working in. If you have used Azure before you may already have resource groups created and you can see these by using the command bellow:
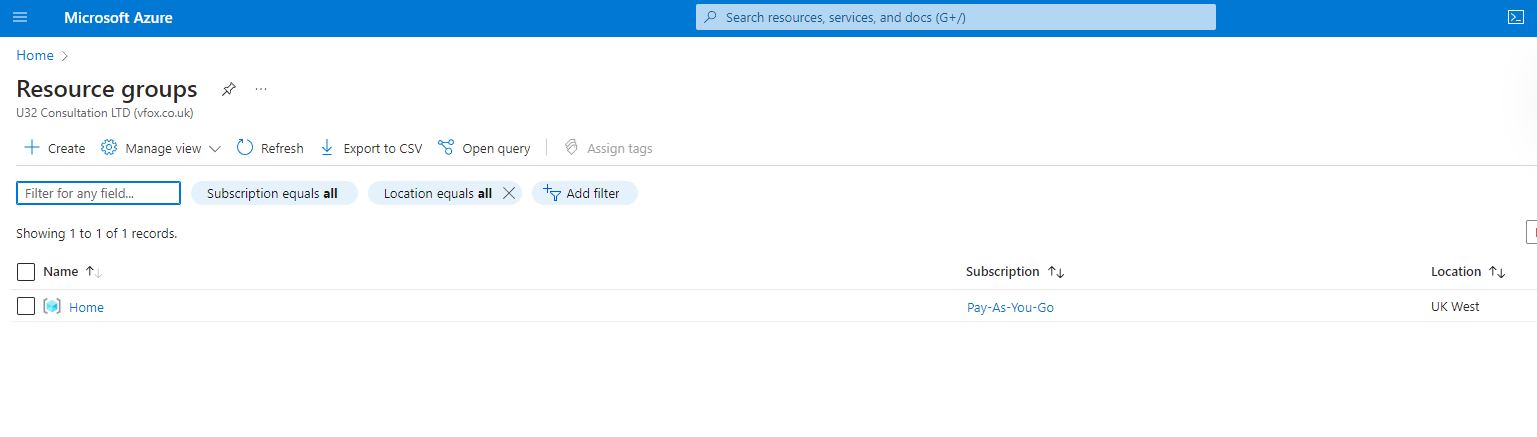
PS C:\WINDOWS\system32> Get-AzResourceGroup


ResourceGroupName : Home
Location          : ukwest
ProvisioningState : Succeeded
Tags              :
ResourceId        : /subscriptions/005a68b4-d341-4460-875a-cb14723b45b4/resourceGroups/Home
This information can be found in the resource groups section of the website
For this demonstration I am going to create a new group called "Demo". Its a good idea to create all of your demo VM's in one group then when your finished you can delete the group making sure you don't end up getting charged for anything.
To create a new "Resource Group" is quite is easy. See bellow:
PS C:\WINDOWS\system32> New-AzResourceGroup -Name demo -Location ukwest


ResourceGroupName : demo
Location          : ukwest
ProvisioningState : Succeeded
Tags              :
ResourceId        : /subscriptions/005a68b4-d341-4460-875a-cb14723b45b4/resourceGroups/demo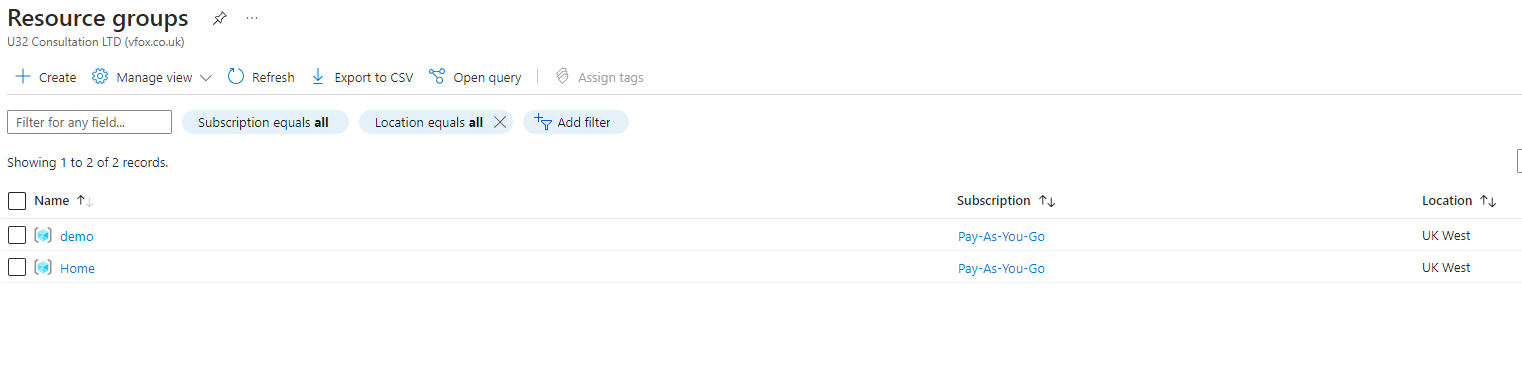
Your new VM is gonna need login credentials. To be clear, these are the credentials you will use to log into the VM you are creating, not your AZ credentials
$cred = Get-Credential 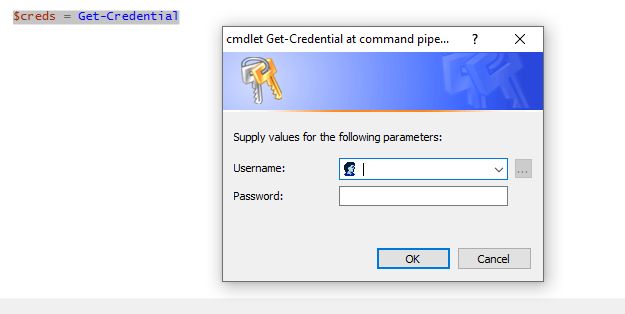
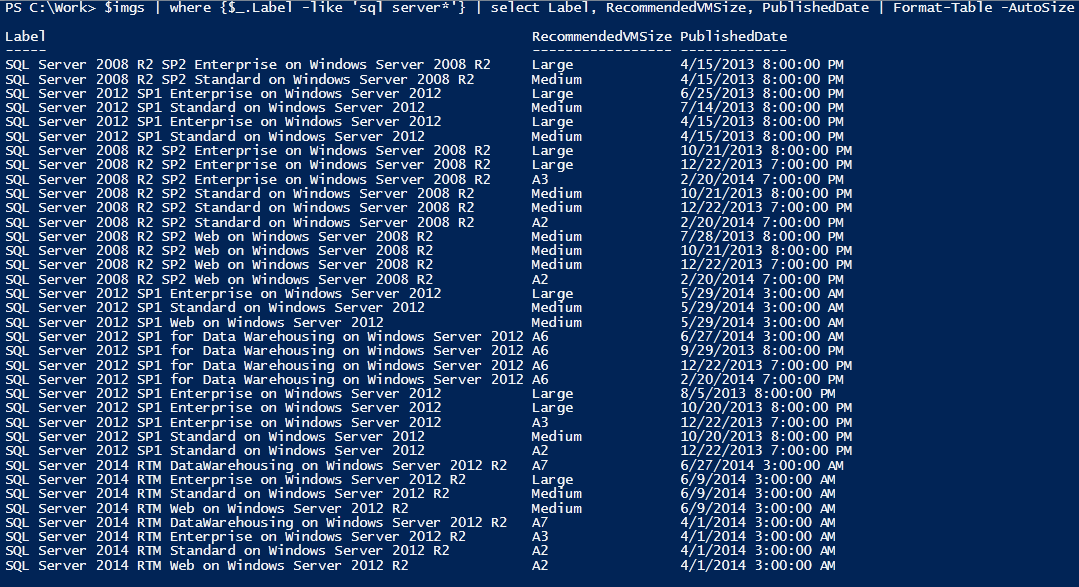
Now we need to think about what VM type we want and there are 2 things we need to consider. The VM type and what OS we want.
As you already know from reading my previous articles on Azure different locations have different VM types, so to find out what VM types we have in our chosen location
The easiest way to get this is from your PowerShell session.
$AZVMSizes = Get-AzVMsize -Location 'UK West'

PS C:\WINDOWS\system32> $AZVMSizes.count
541
as you can see there are a lot of options here so we are going to pull the list back and then use PowerShell to find one that meets our requirements. As this is a demo, we just want something that will be as cheap as possible. So I will look for the smallest VM there is. Starting with one core.
$AZVMSizes | Where-Object{$_.NumberOfCores -eq 1}

Name             NumberOfCores MemoryInMB MaxDataDiskCount OSDiskSizeInMB ResourceDiskSizeInMB
----             ------------- ---------- ---------------- -------------- --------------------
Standard_B1ls                1        512                2        1047552                 4096
Standard_B1ms                1       2048                2        1047552                 4096
Standard_B1s                 1       1024                2        1047552                 4096
Standard_D1_v2               1       3584                4        1047552                51200
Standard_F1                  1       2048                4        1047552                16384
Standard_DS1_v2              1       3584                4        1047552                 7168
Standard_F1s                 1       2048                4        1047552                 4096
Standard_A1_v2               1       2048                2        1047552                10240
Standard_A0                  1        768                1        1047552                20480
Standard_A1                  1       1792                2        1047552                71680
Basic_A0                     1        768                1        1047552                20480
Basic_A1                     1       1792                2        1047552                40960
Standard_D1                  1       3584                4        1047552                51200
Standard_DS1                 1       3584                4        1047552                 7168
Standard_DC1s_v2             1       4096                1        1047552                51200
From this list I am going to chose : "Standard_B1ls"
Next we need to select the operating system we are going to install. Again there a a LOT of these and the process is a little bit convoluted. Bear with me. The goal of the next steps is to create a string that looks like this:
MicrosoftWindowsServer:WindowsServer:2022-Datacenter:latestWhich breaks down to:
Publisher:Offer:SKU:Version
That wont mean a lot right now but it should become more clear as you work through the bellow steps.
To select the correct publisher. (At the time of writing there are over 2000 of these.) Use the following to get a list:
Get-AzVMImagePublisherI already know that the one I need is called "MicrosoftWindowsServer".
Now to decide what offering we want. You can list them as bellow but I know I want "WindowsServer".
PS C:\WINDOWS\system32> Get-AzVMImageOffer -Location 'UK West' -PublisherName
Now we want to see what OS options we have. They are called SKU's
Get-AzVMImageSku -Location 'UK West' -PublisherName "MicrosoftWindowsServer" -Offer WindowsServer
we need to get the version, or you can just use "Latest". Again the command to list is bellow.
Get-AzVMImage -Location 'UK West' -PublisherName "MicrosoftWindowsServer" -Offer WindowsServer -Skus 2022-datacenter
Now we need to take all the information we have collected during this process and put it all into a handy array
$vmParams = @{
  ResourceGroupName = 'Demo'
  Name = 'Demo1'
  Location = 'ukWest'
  ImageName = 'MicrosoftWindowsServer:WindowsServer:2022-Datacenter:latest'
  PublicIpAddressName = 'DemoPublicIp'
  Credential = $creds
  OpenPorts = 3389
  Size = 'Standard_B1ls'
}
Other things in this array we haven't mentioned.
OpenPorts : Opens the RDP port so you can connect to the machine
PublicIpAddressName: can be anything. We don't need to worry about this at this stage.
Now FINALLY! we can create the VM
New-AzVM @vmParams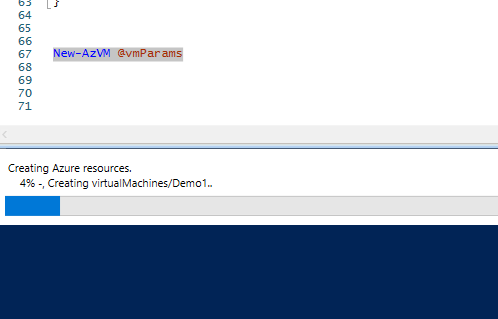
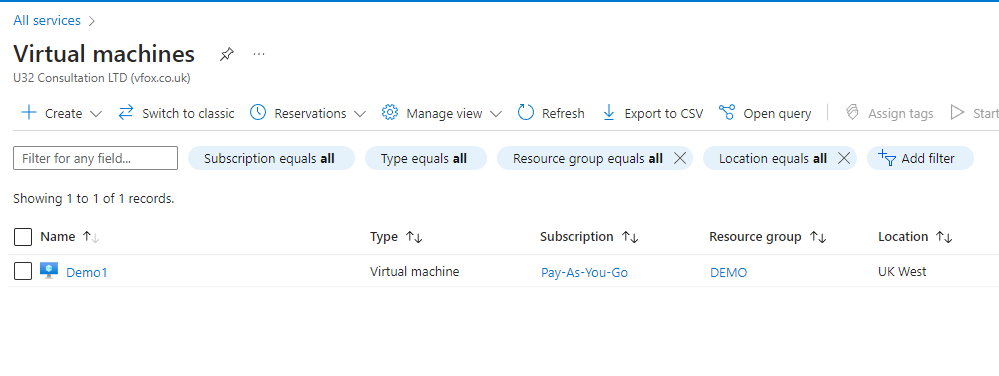
Once the VM is built you can see can connect to it via the IP listed and the credentials you created earlier.
Next time we will look at how to delete these VM's from PowerShell.