Before you continue please consider clicking on one of the horrible ads. I know they are a pain but they help me pay for the hosting of this site. It owes me a lot of money. Sob story over.
I am not going to lie to you. Port forwarding on V7 is pretty much the same as V6 and if I remember rightly that was the same as V5 but the internet is a hungry beast crying out for content. We need to feed the best lest we feel is wrath.
I am going to use the phrases Virtual IP and VIP interchangeably, get over it.
log into your firewall and go to 'Policy & Objects' -> 'Virtual IP's' -> 'Create New' -> 'Virtual IP'
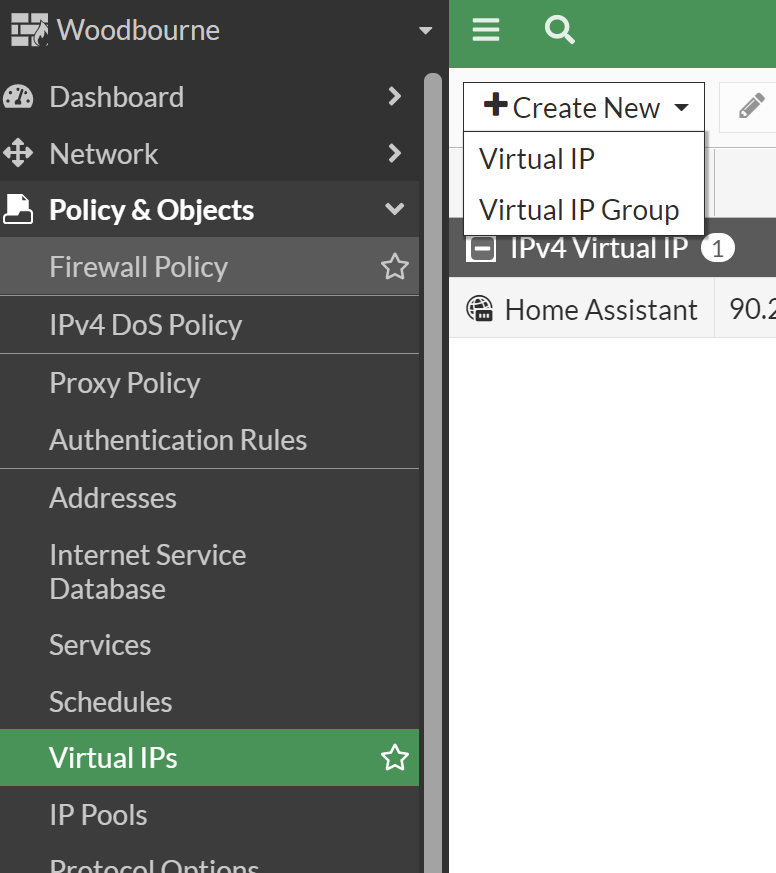
This will bring you up a wizard.
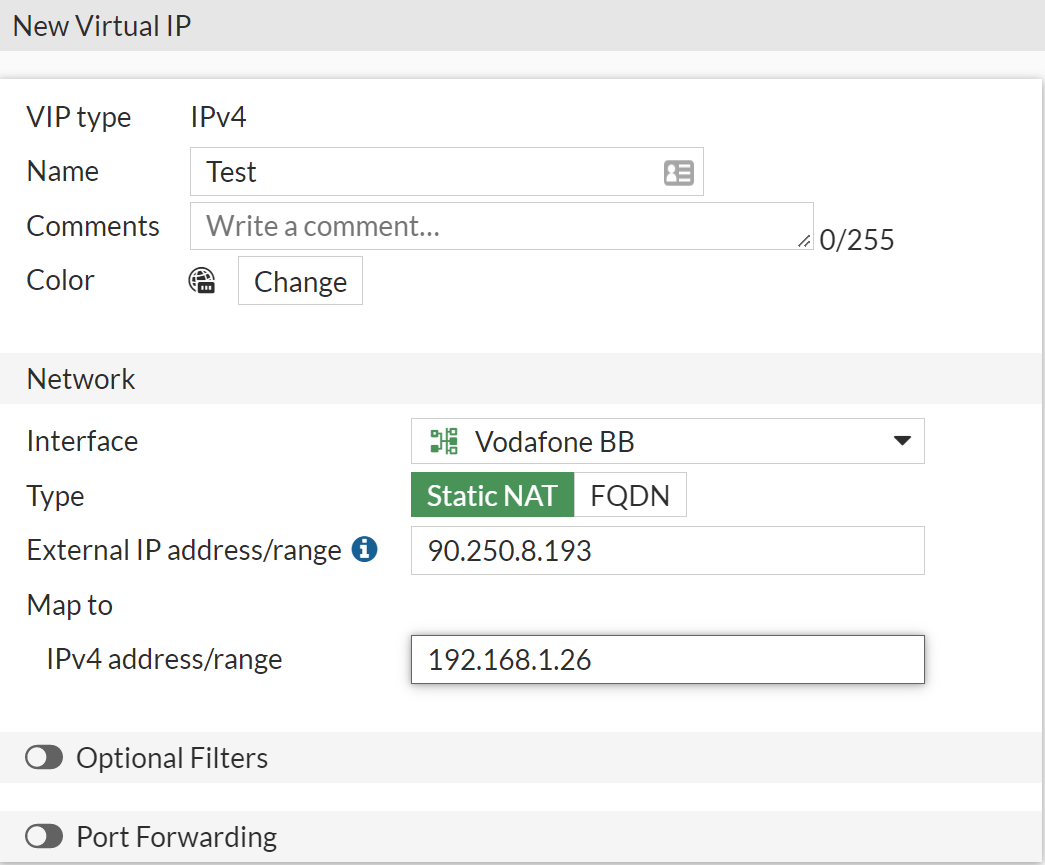
Name the VIP. I want to port forward traffic coming from internet on port 80. So under interface I choose the one that is the internet. For me that's Vodaphone BB.
and the traffic is being forwarded to an IP on my network 192.168.1.26. So i put that in the 'Maps to' field.
If i was NAT'ing the whole IP I could stop there but we just want traffic from port 80. So we need to flick the switch called 'Port Forward'
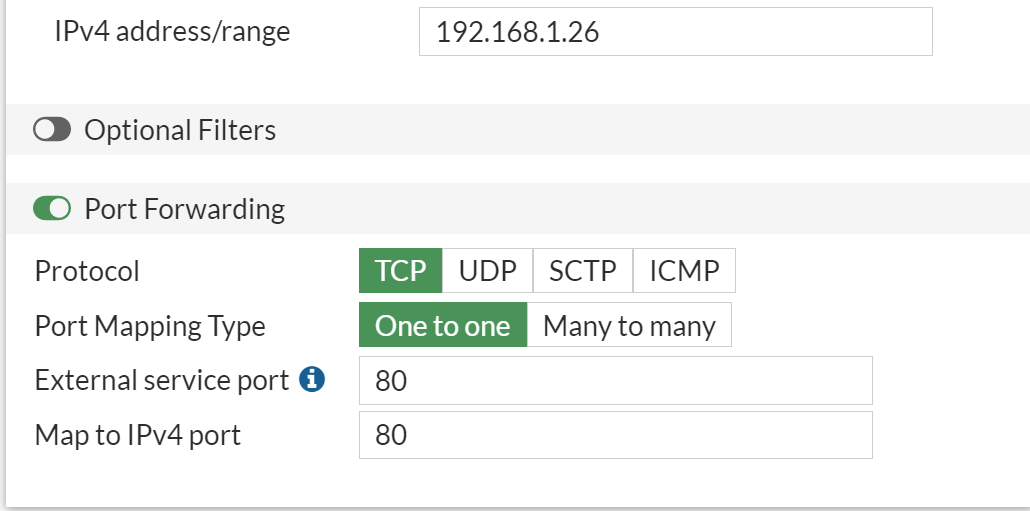
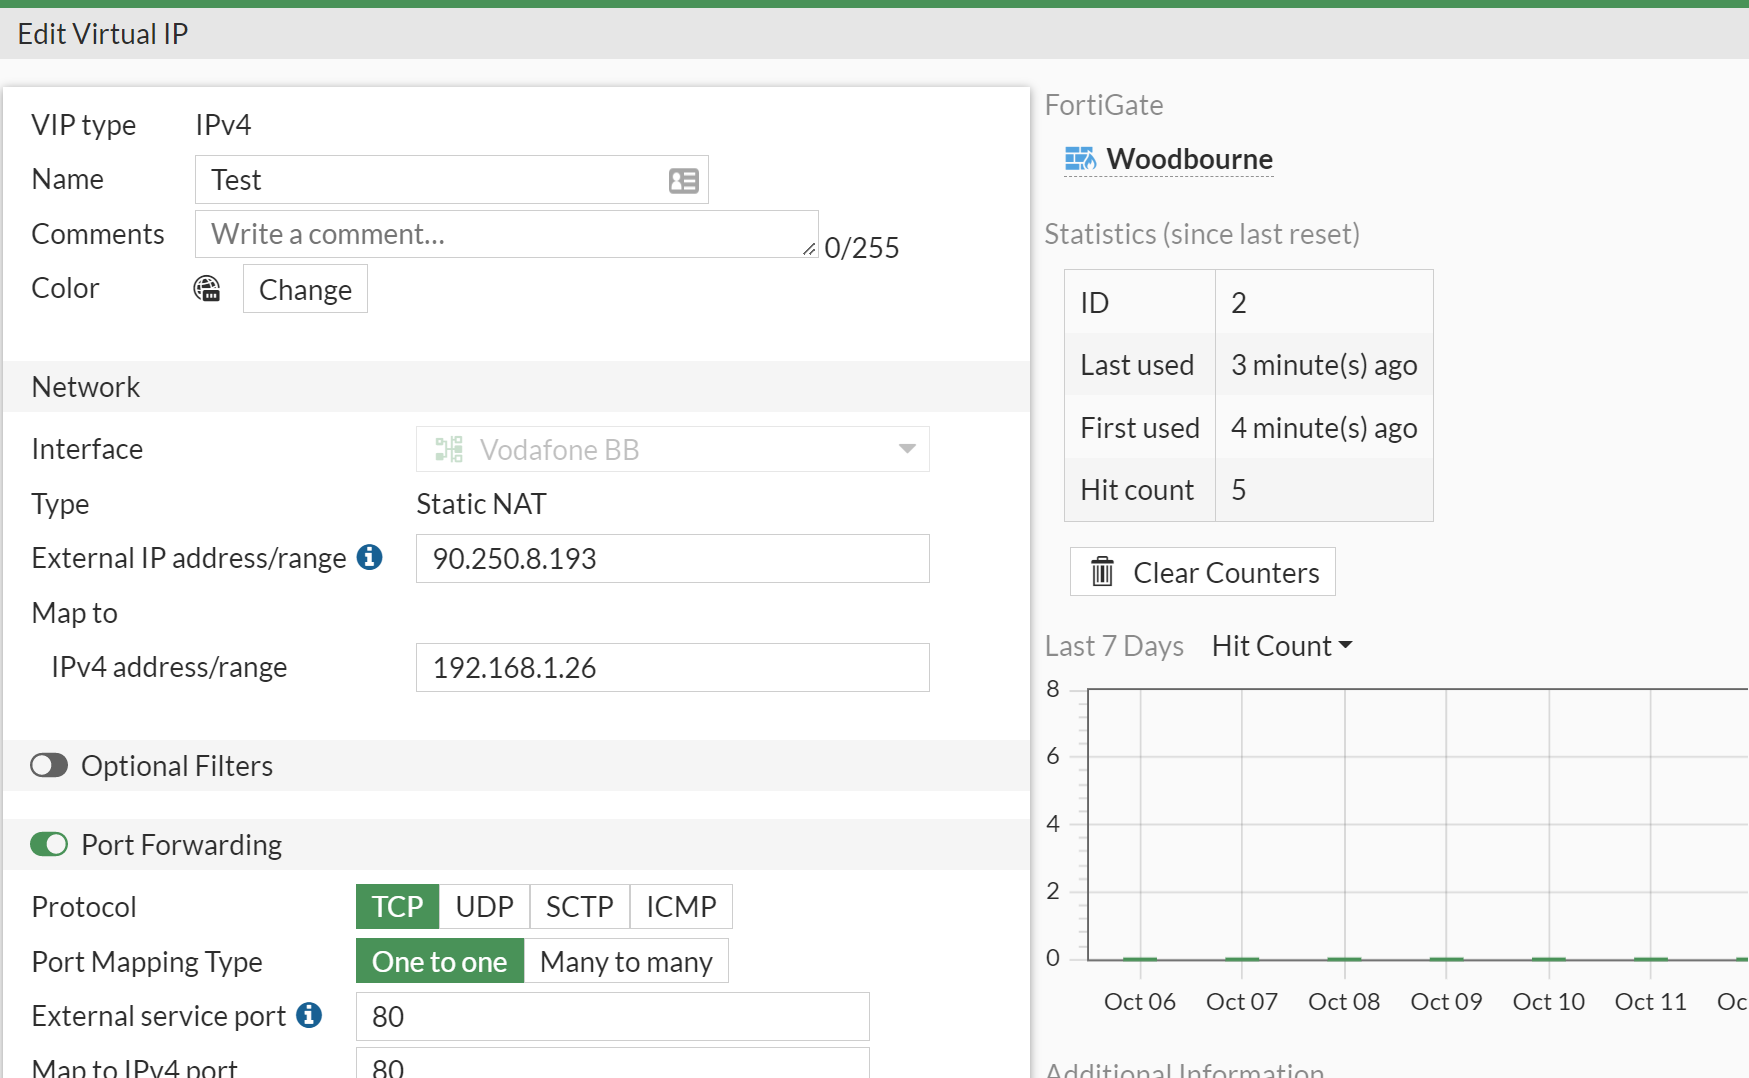
Now we put port 80 into both the 'External service port' field and the 'Map to IPv4 port' (As we want to forward port 80) and click OK to save.
Now you have done the port forward part but we aren't don't yet. We need to create an IP Policy to allow the traffic,
Navigate to 'Policy & Objects' -> 'Firewall Policy' -> 'Create New'
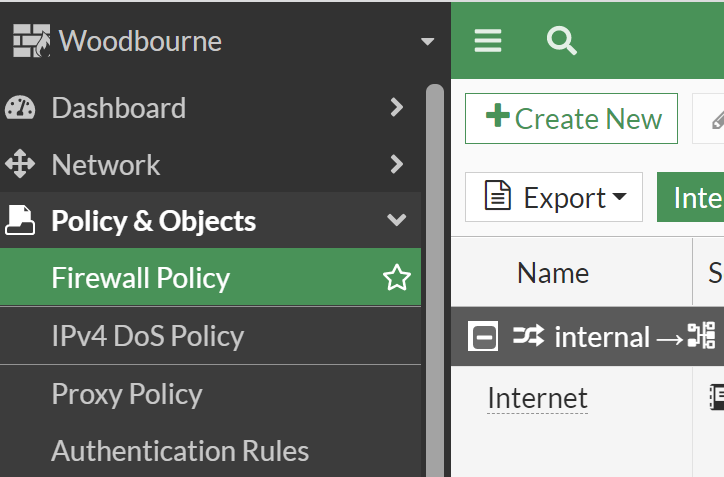
This will bring up a blank policy.
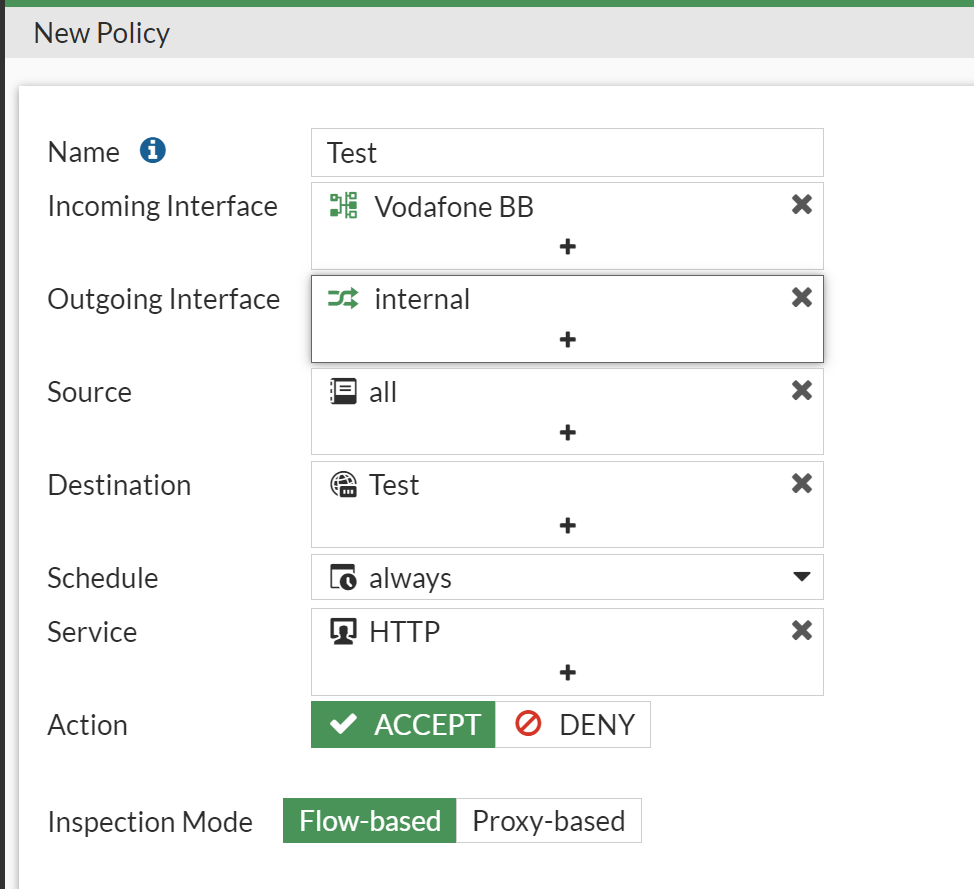
- Incoming Interface - Again this is the internet facing interface
- Outgoing Interface - This is the network where the server is. For me this is 'internal'
- Source - I have set this to 'all' but if you wanted to restrict traffic by IP then here is where to do that.
- Destination - The VIP you created previously will have created itself a firewall object. Select this (See Bellow)
- Schedule - I have selected always but you can set it to a specifc window should you wish
- Service - We are dealing with web traffic on port 80. There is a premade firewall object for this that I have selected.
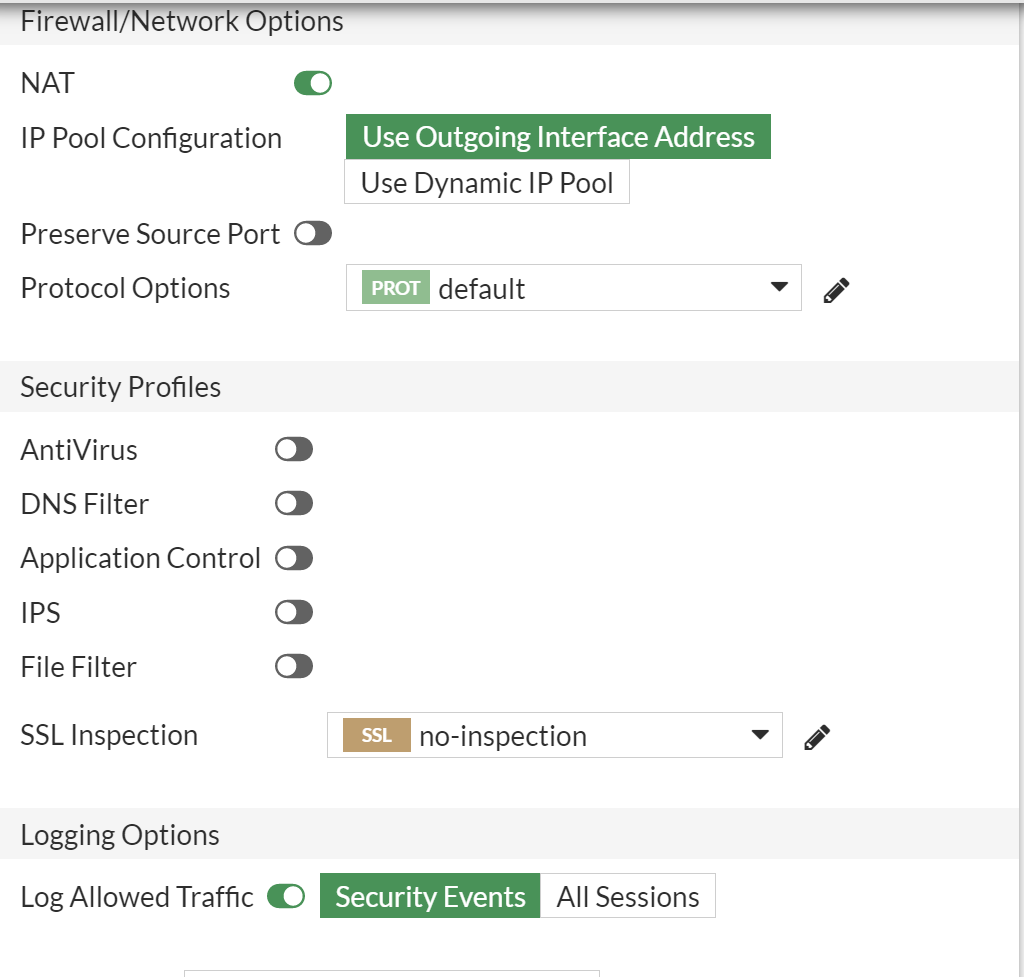
Now in the next section, we want 'NAT' on as we are nat'ing this traffic, but you can leave the rest as the default. Here you can also apply some of the advance features of the fortigate such as AV and IPS. I am not going to cover that in this guide.
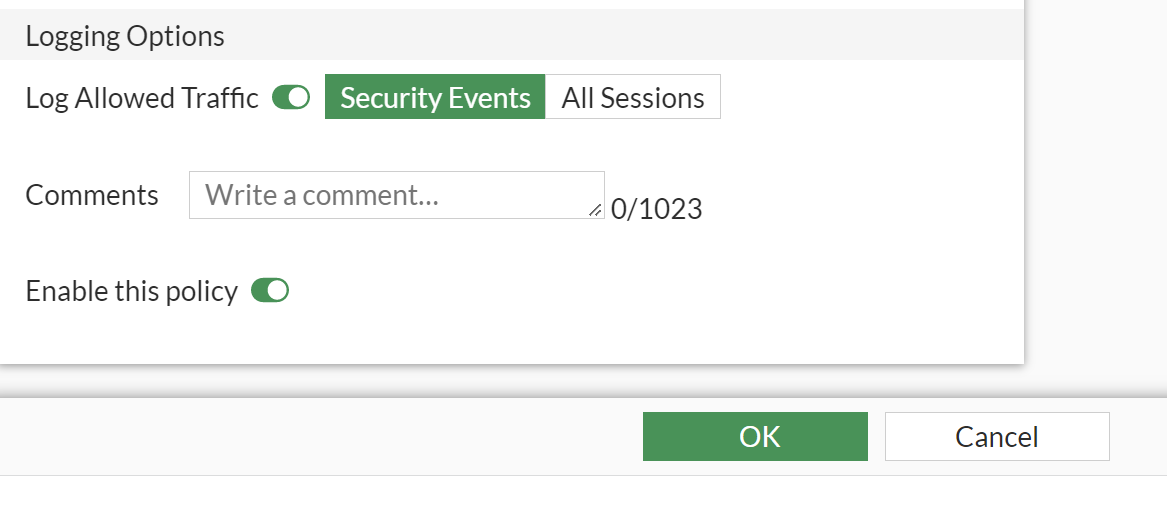
Finally ensure the policy is enabled and click OK.
Congratulations, you have set up a port forward on a FortiGate.
As an extra tip. If you are having issues with whatever service and you want to know if its the firewall config or the app server, well we can check that on the firewall.
Select the rule you just created again and click edit
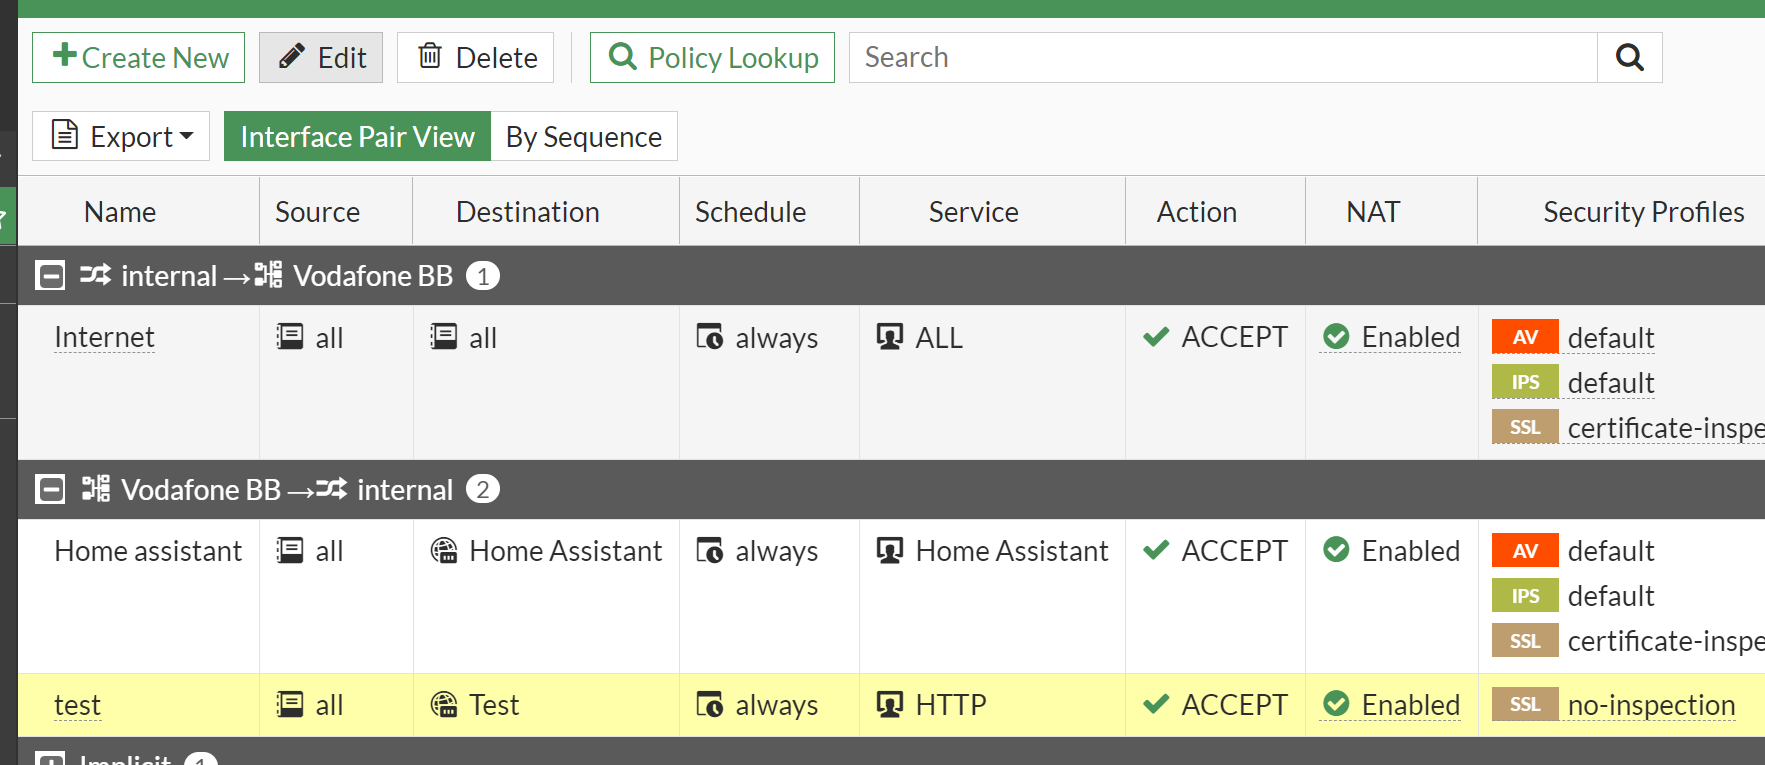
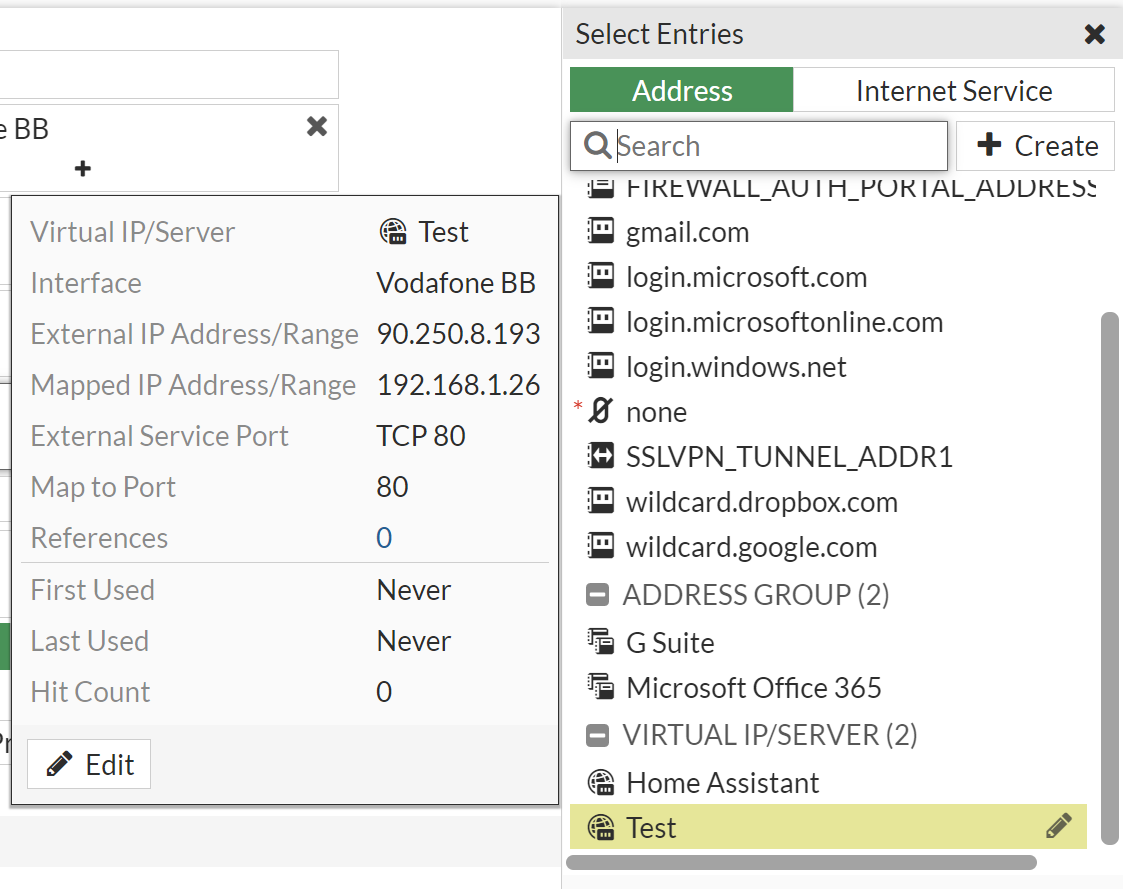
this will bring you the policy screen from before but on the right hand side you now have this:
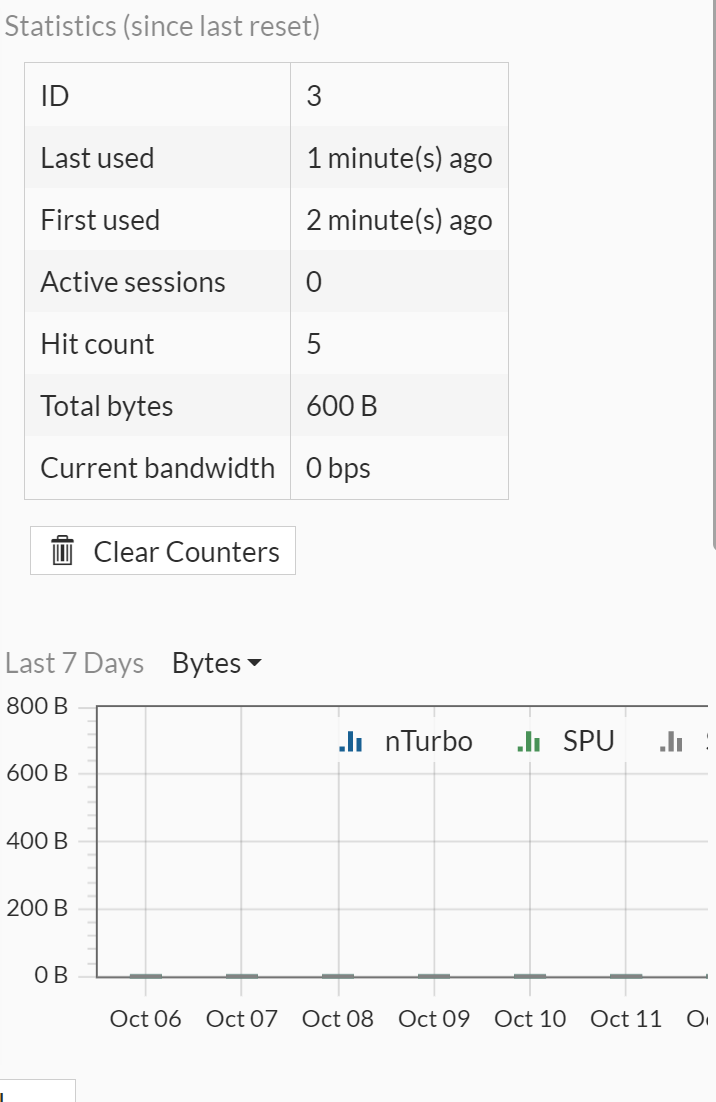
that will show you some useful information about what traffic has passed on that rule. If you have tried to test it and this has a hit count of zero, the chances are the firewall configuration is incorrect.
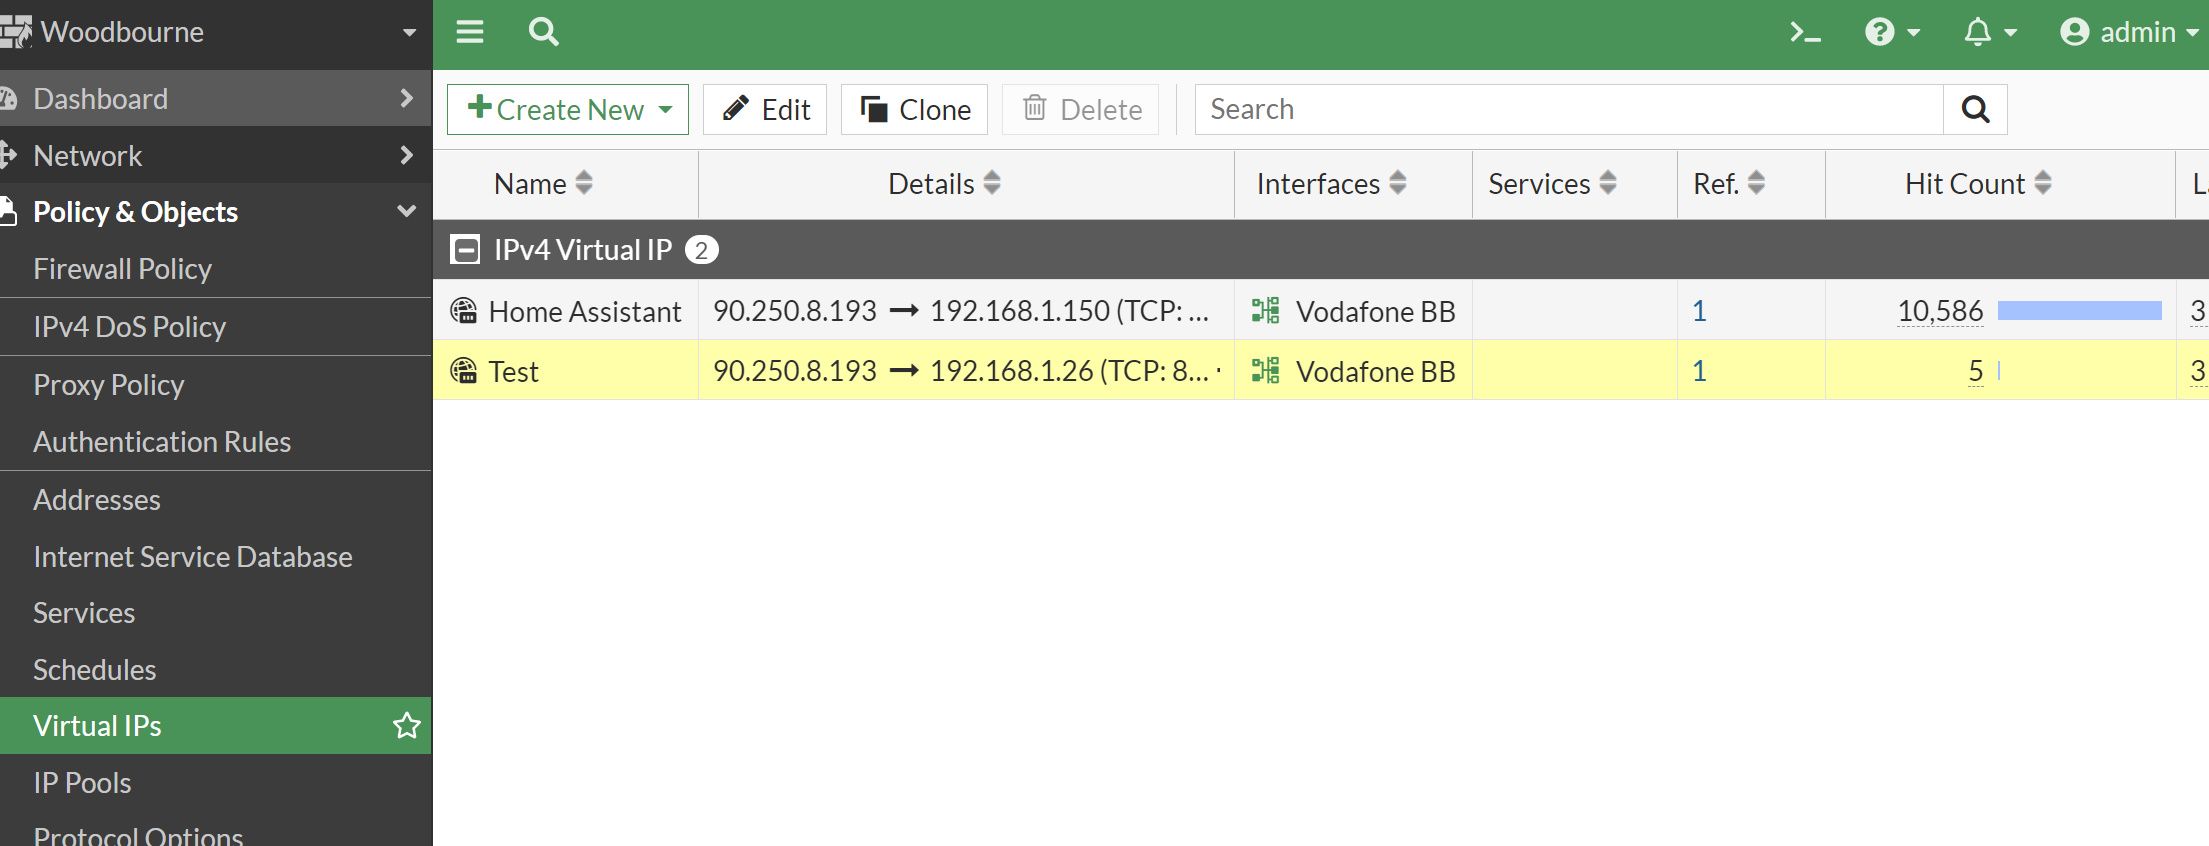
You can also see this information in the VIP