There are a lot of guides for this out there and I'm convinced 99% of them are just badly copied from someone else guide. They all seem to contain any number of errors that will stop you dead in your tracks if trying to do this for yourself. Hopefully, this contains all the steps needed to use VM-Fleet. Let me know if I forget anything.
To start with we are going to assume that you have a fully working S2D cluster, and have no CSV's currently set up and that you have a storage pool called something like "S2D on Clustername".
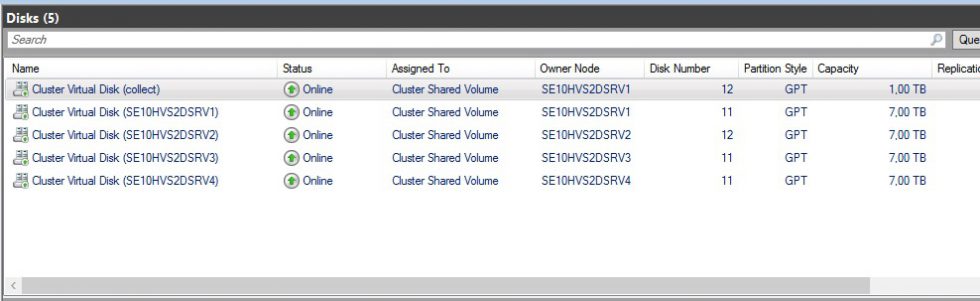
In S2D the storage operations happen on the node that is currently the owner of the CSV. That means it uses CPU cycles from that host. Therefor it makes sense to split your storage up into as many CSV's as there are hosts, thus splitting your storage load. This script with automatically create a single CSV per host in your cluster and name them in such a way that VM-Fleet can handle them later.
Get-ClusterNode |% { New-Volume -StoragePoolFriendlyName "S2D*" -FriendlyName $_ -FileSystem CSVFS_ReFS -Size 1TB }
VM-Fleet also needs you have a CSV called "Collect. So we will create that too.
New-Volume -StoragePoolFriendlyName "S2D*" -FriendlyName collect -FileSystem CSVFS_ReFS -Size 1TB
At this stage, I should point out that my environment is 100% SSD, so there is no need for me to worry about storage tiers and the like. You, on the other hand, may not be so lucky. So here is a link to the docs for New-Volume.
Next, you will need the latest version of VM-Fleet which can be obtained from here
Download it and extract it to this location
c:\source\
This is where a lot of the guides get a bit vague and strangely all the same, which makes me think a lot of you naughty people have more than likely not tried this but rather scalped it from some other hardworking techs site. Naughty naughty.
You should know this, but make sure PowerShell is running as administrator and you can run unsigned scripts.
Now we run the scripts to set up VM-Fleet. If you extracted the Git repository as is, you need to run the following.
C:\Source\Frameworks\VMFleet\install-vmfleet.ps1 -source C:\Source\Frameworks\VMFleet
This will then copy all the relevant bits to the "Collect" CSV you created earlier and add the relevant location of the functions to the system path.
Now we need to copy the latest version of DISKSPD to the following location
C:\ClusterStorage\collect\control\tools
Now we create an image to test.
Create a server 2016 core VM, making sure you create a fixed size virtual disk of about 30GB, basically big enough for the OS and a test file VM-Fleet will create later. You don't want it any bigger than this as it will take an age to deploy all the VM's if they're too big.
Power off the VM, don't sysprep it, then copy the VHDX to the following location.
C:\ClusterStorage\collect\control
If like me you accidentally created the image as dynamic VHDX, don't worry, the next bit will automatically convert it to fixed, it will just take a little longer.
Now we create our fleet. Run this
create-vmfleet.ps1 -basevhd 'C:\ClusterStorage\Collect\BaseIMage.vhdx' -vms 10 -adminpass P@55w0rd -connectuser gruympytech -connectpass P@55w0rd
Where :-
- "adminpass" is the administrator password for the image you are using
- "connectuser" is a domain account that has access to the cluster
- "connectpass " is the password for said domain account.
- "vms" is the number of VM's to create per Datastore
This script was written by some amazing person who is clever than me, however, here is what (i think) it does
- Check the VHDX, and if its dynamic convert it to fixed.
- On each host it will create a new internal vSwitch called "Internal"
- On each host it will create a new virtual interface and give it a 169 address, meaning it can talk to any fresh windows build right out of the box. (clever eh)
- it will then copy the VHDX and put it in the correct folder structure the required amount of times.
- Create VM's to go with these files and then add them to the cluster
Wonderful.
Next, we want to consider changing the spec of each VM to whatever you want. Now this bit was another one of those areas where every other guide I found had a line of PowerShell that I just couldn't get working. I checked the PowerShell of the actual function and I'm pretty sure they must have changed this in new versions. No matter how hard i tried i couldn't get it to disable dynamic memory using this command. In the end, I settled on this :-
set-vmfleet.ps1 -ProcessorCount 2 -MemoryStartupBytes 8GB -MemoryMaximumBytes 8GB -MemoryMinimumBytes 8GB
Which is not the same but will have the same effect.
Now the the really fun part, lets do some testing, for this bit we need a second PowerShell instance. We have one to issue the commands and one to view the live results, although it will also log the results to a file. In the second PowerShell window(administrative of course) run this
Watch-Cluster.ps1
and you should get something that looks like this

This is the current live stats of the cluster.
Now back to your original PowerShell window, start the VM's with this command
start-vmfleet.ps1
This in its self should create an interesting amount of load but wait until they are booted and we can configure DiskSpd to be more reflective of your environment. Looking at my old storage i can see that our typical storage usage looks like this :-
35% Writes to 65% reads
16KB block size
and my test VM's have 8 cores, so i will configure my DiskSPD will look like this
Start-Sweep.ps1 -b 16 -t 8 -o 16 -w 35 -d 60 -p r
As soon as you issue this command the system will configure DiskSPD on all the hosts and then start the test.
Now in your other PowerShell window you should be able to see the live stats of your cluster. HAZZAR you did it!!
Summary
This is the documentation of the first S2D build of my POC cluster. Now I trash the whole thing and rebuild it to test S2D with NTFS and de-duplication. I bet you all can't wait for that.
If you have any questions please comment or email me.