Before you continue please consider clicking on one of the horrible ads. I know they are a pain but they help me pay for the hosting of this site. It owes me a lot of money. Sob story over.
I have some practical guides lined up that will need you to know how to build a basic Linux server in Hyper-V
There are lots of guides out their for this but none of them where written by me so are obviously rubbish...
I am assuming that you already know how to install Hyper-V and have it set up and ready to go, and have a virtual network that has access to the internet.
First of all you need to download the latest version of Centos. At the time of writing this that is version 8, which is called Centos 8 Stream for reasons that escape me.
You can find the mirror list for Centos 8 Steam here. Some of these images will facilitate off-line install but the one I tend to use is the CD ISO which is about 800mb. This needs the VM to have internet access during setup. You can download the DVD which contains everything, but who has time for that?
VM changes
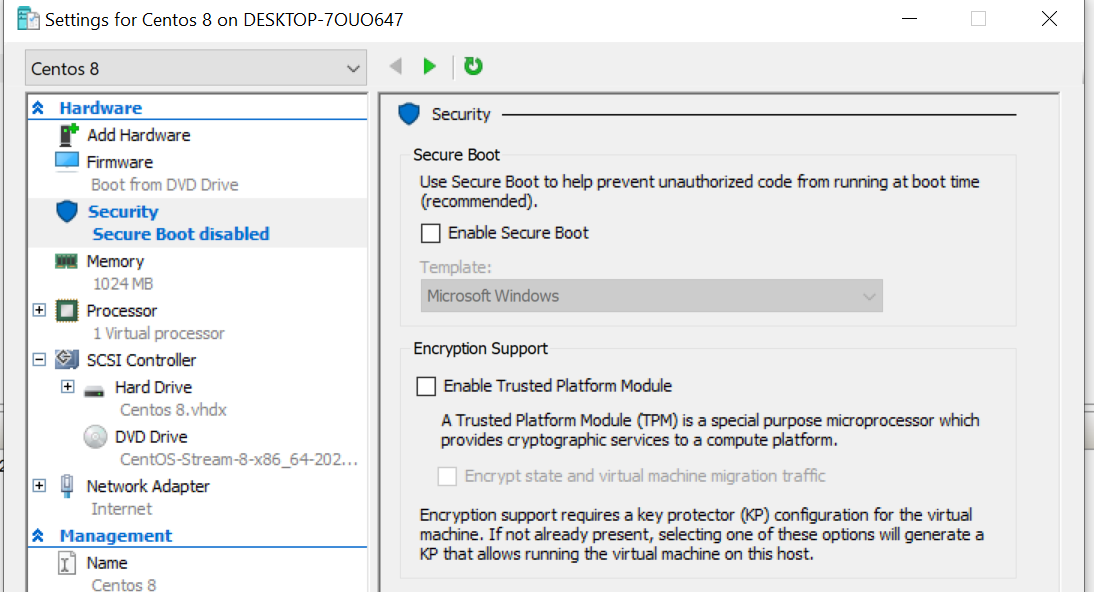
Before you power on the VM you need to go into the VM settings and disable secure boot. Change your Processor count while your here. It will work fine with 1 but I never give anything less than 2 because why would you. Even a desktop is core city these days. Stop being so tight.
Now mount the ISO you downloaded earlier and power that baby on.
The next thing you will see is this
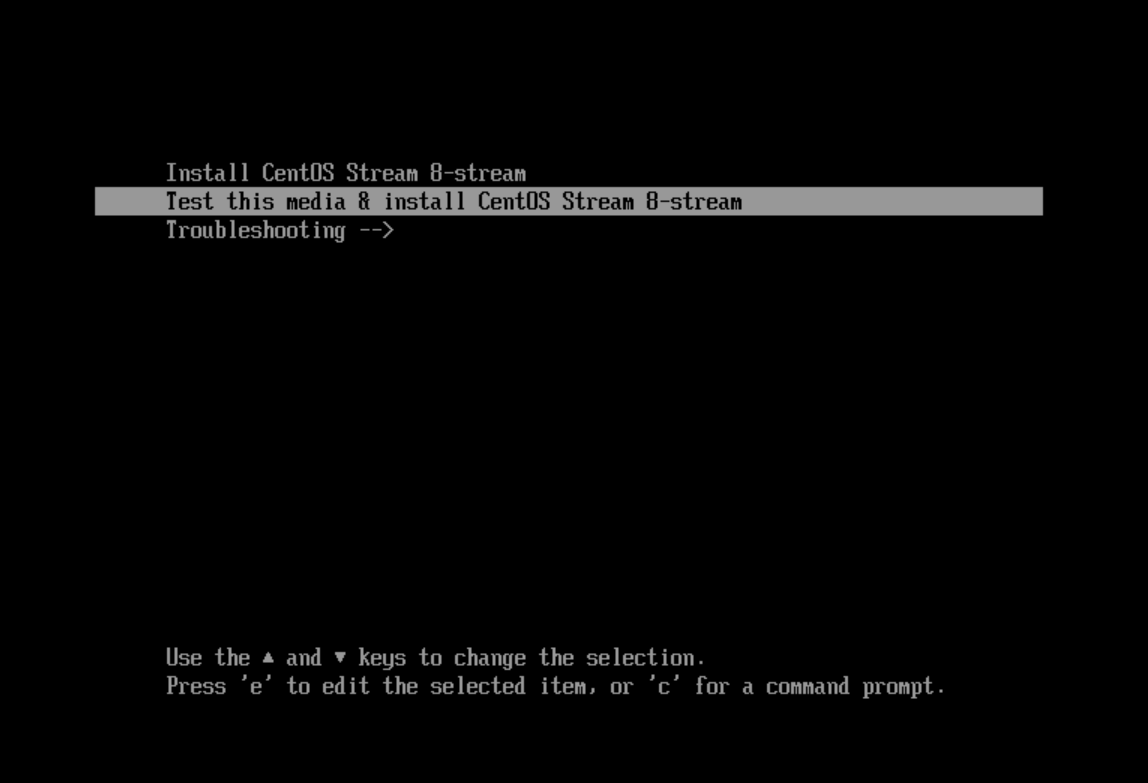
Choose the top option (Install). It will know load for a few moments before you are presented with...
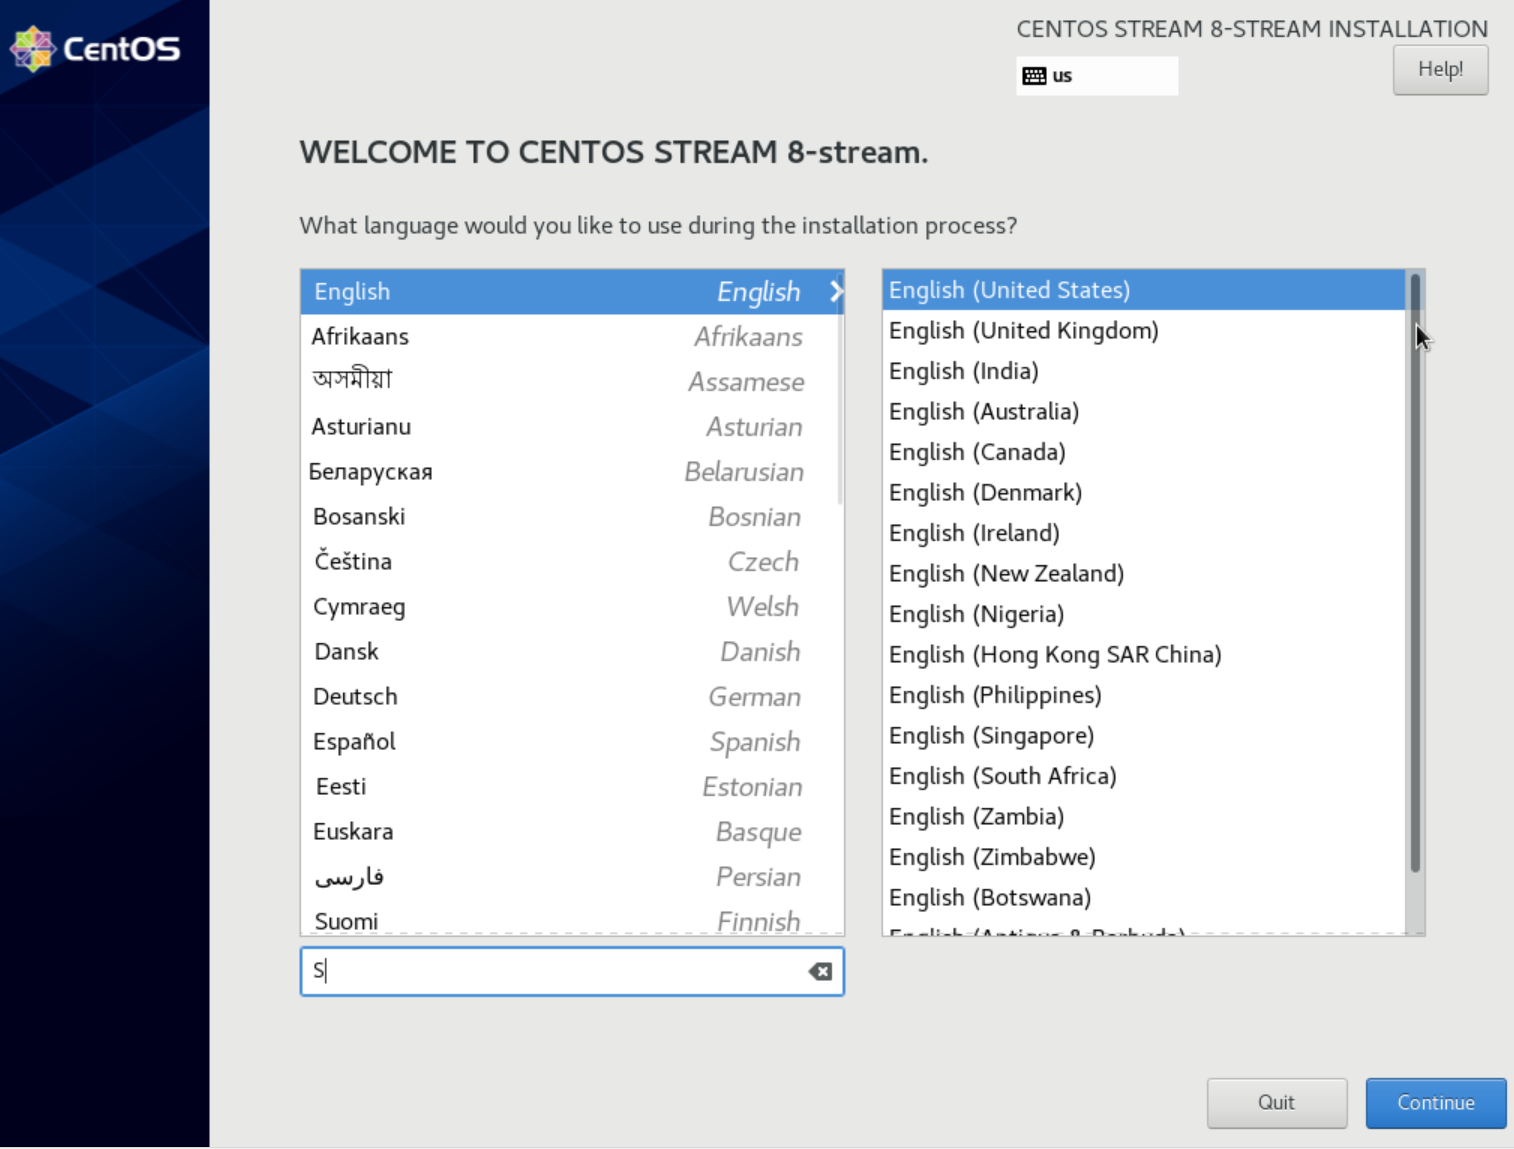
Language selection. You can use your mouse here to make it easier. After this we have the good stuff.
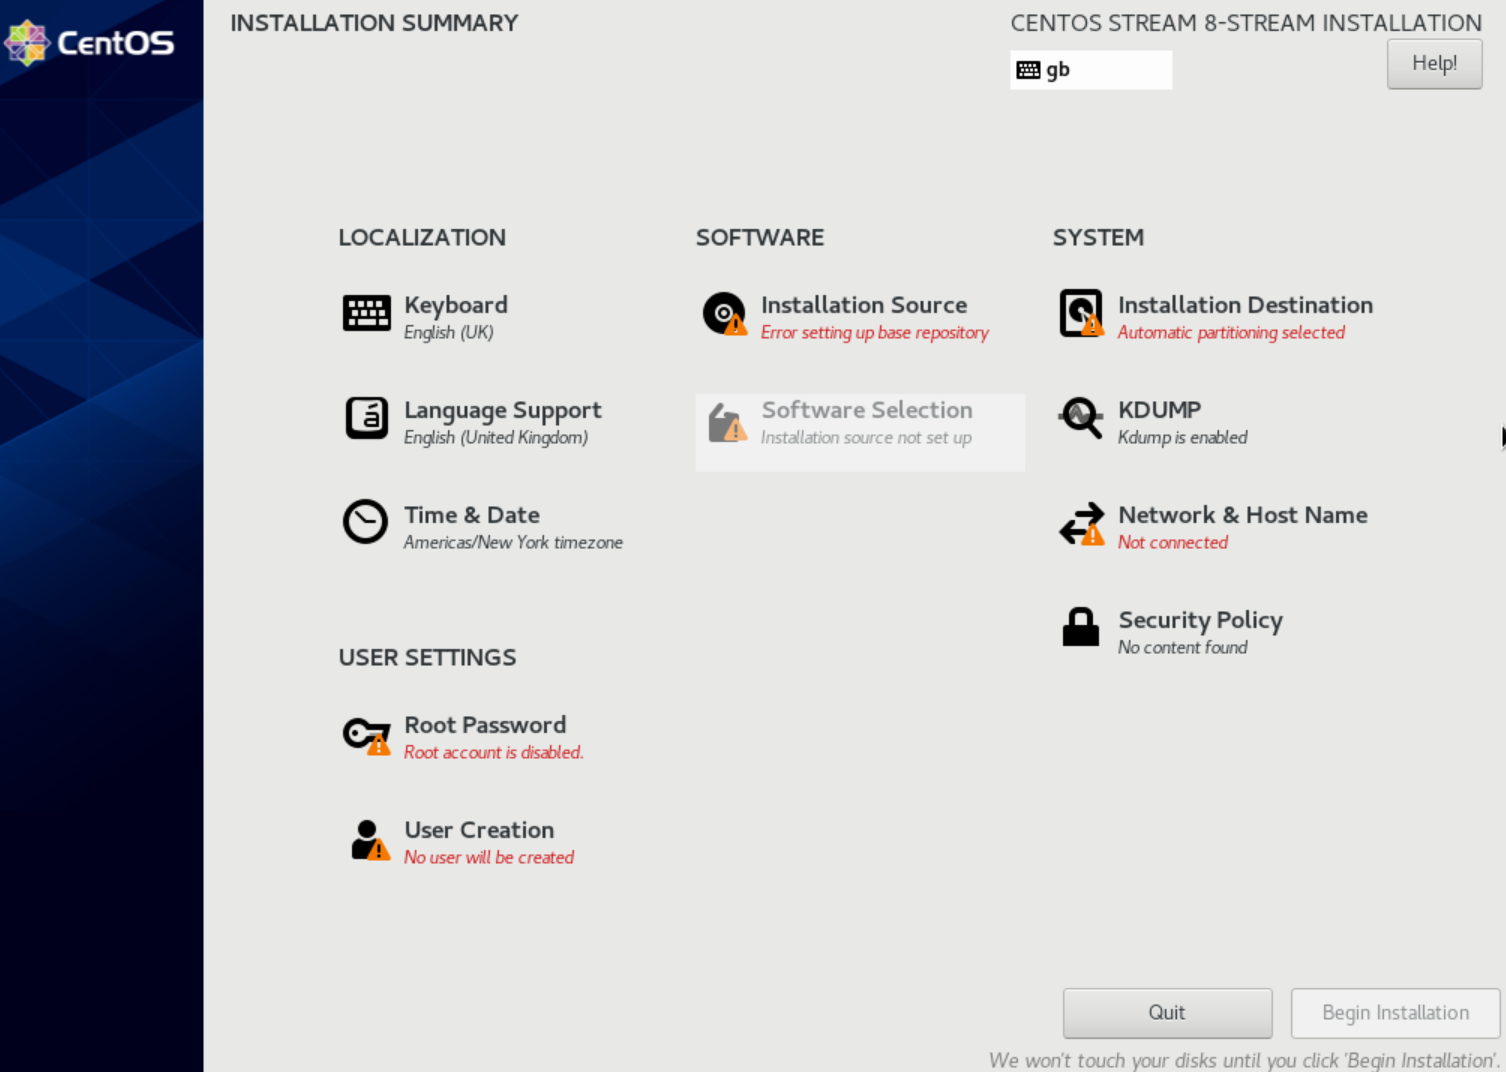
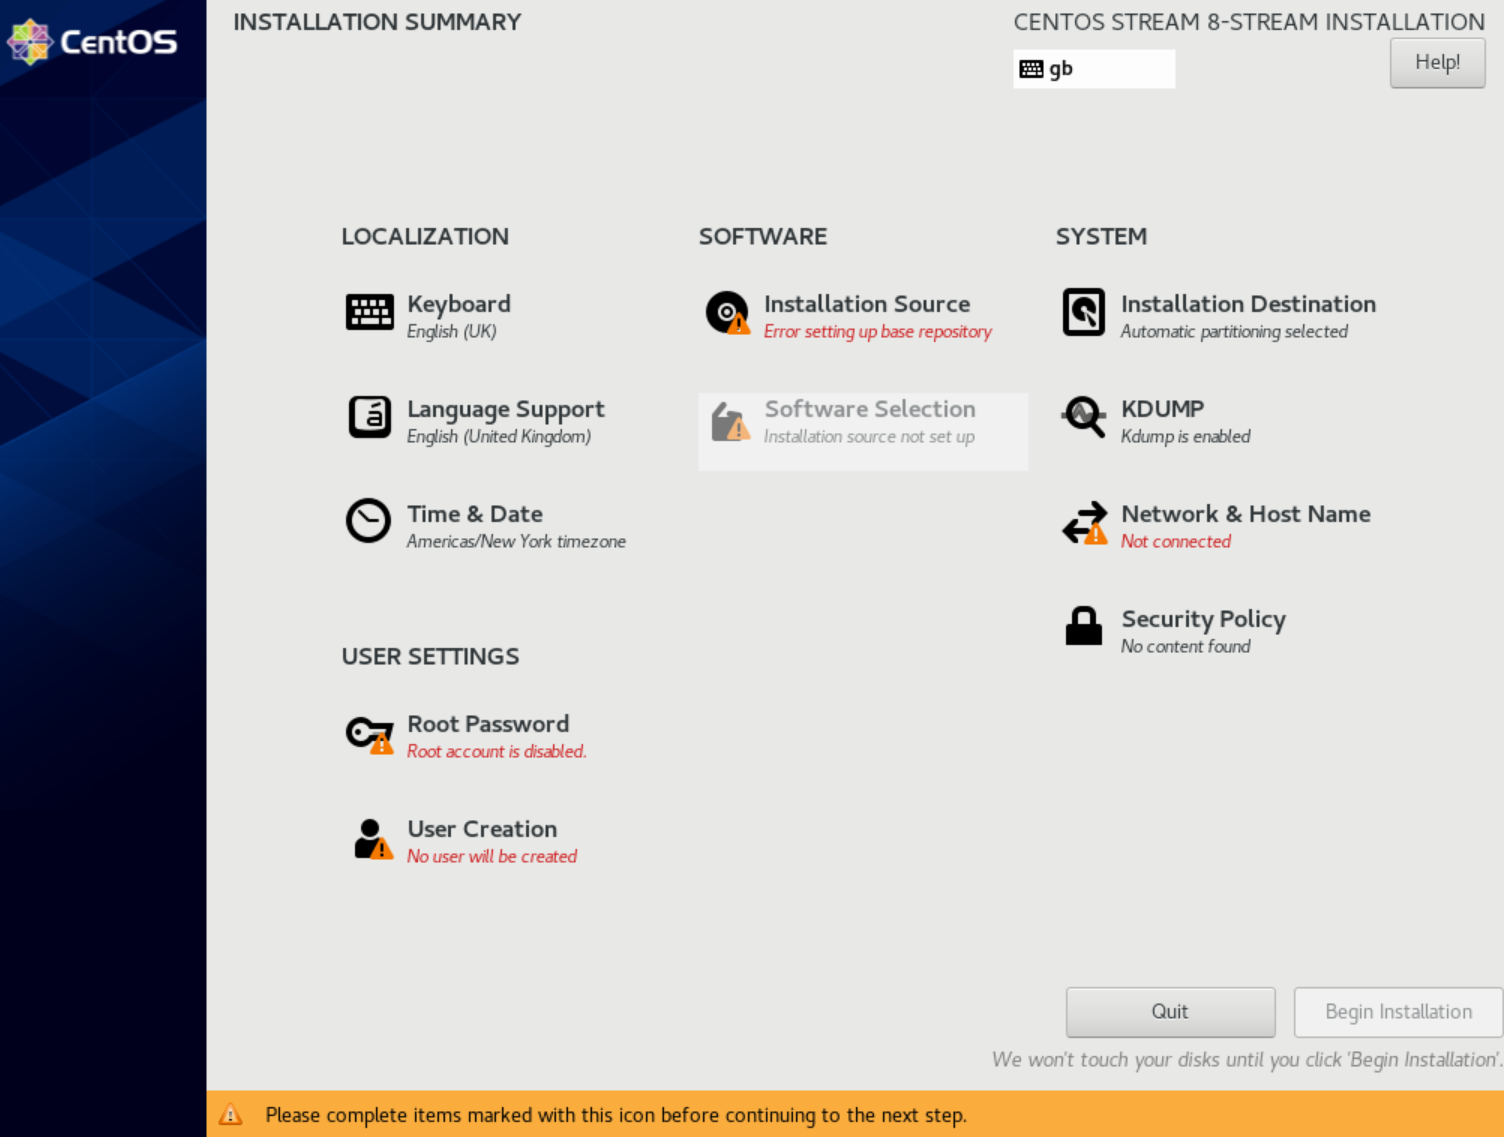
This is the main setup screen, which i guess is a wizard of sorts.
- The things with red comments need attention.
- The greyed out section cant be altered until a red section has been dealt with.
- The non red/greyed out bits are bits that don't need your input, but you can change them if you like.
You can takle these in any order but for this version of Centos you need to do the network before you do the installation source, as the source we are using is On-line.
I will start with Installation Destination.
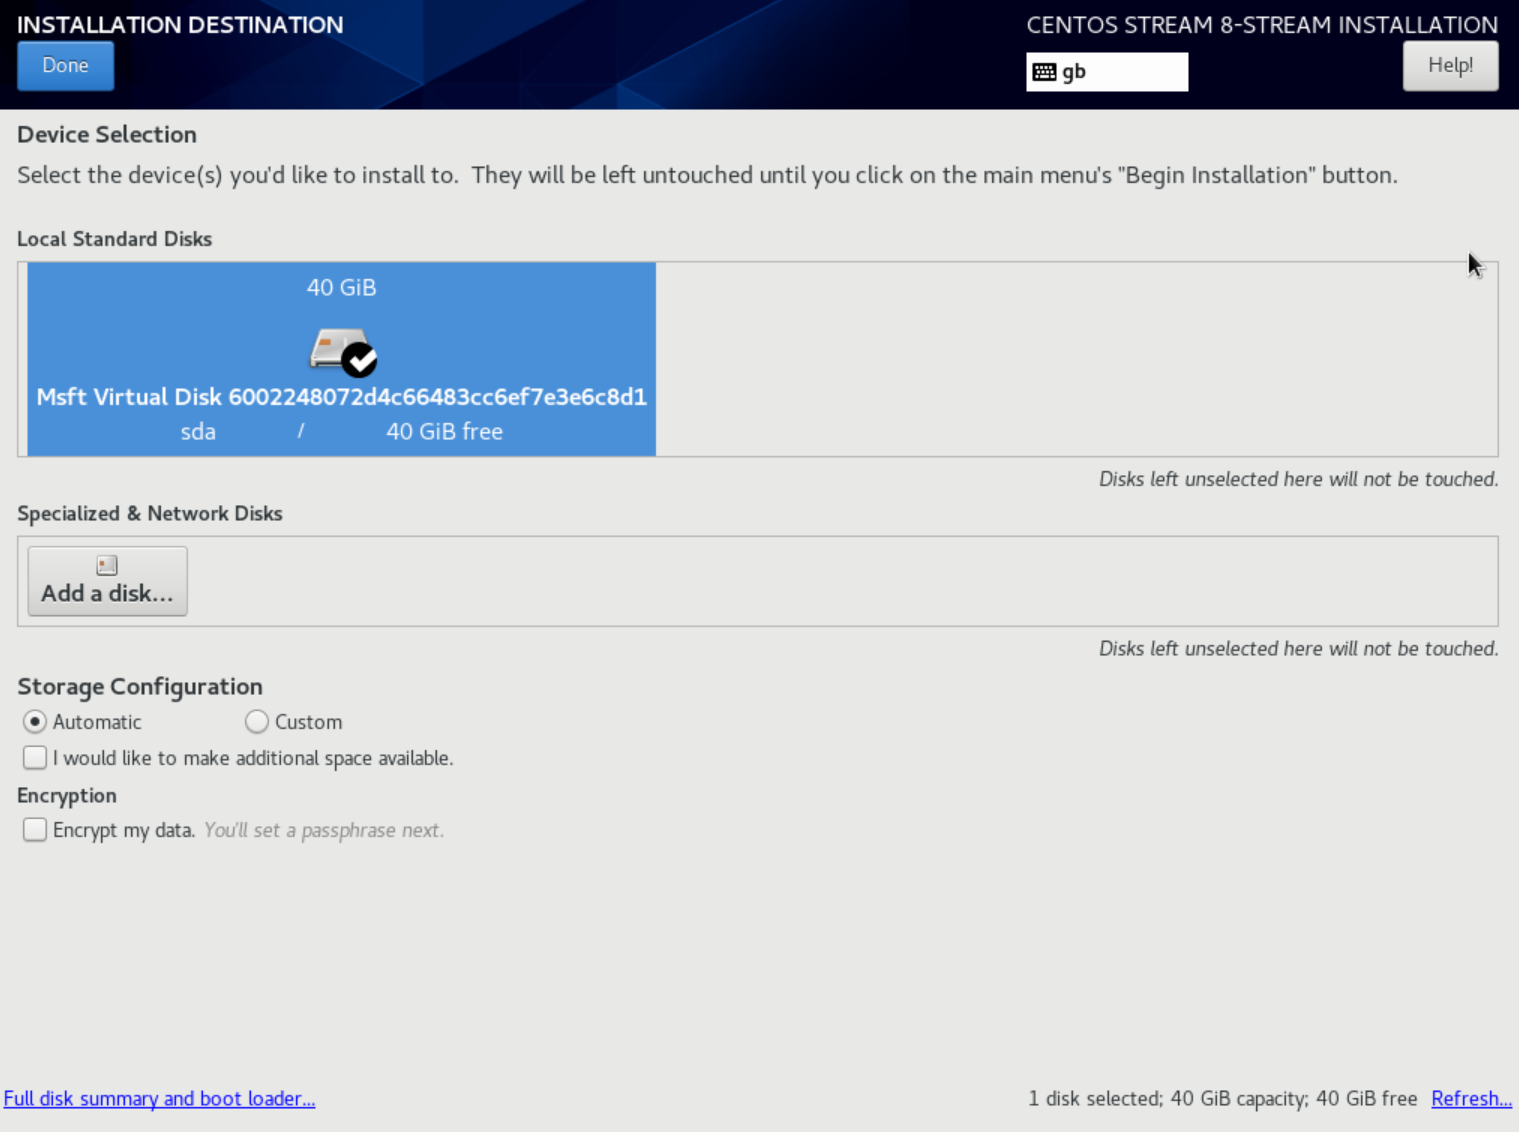
Just click on the disk you want to install the OS. We will use 'Automatic' for the Storage configuration, then click done.
Now you can see the Installation destination section is happy. Next we will tackle the network.
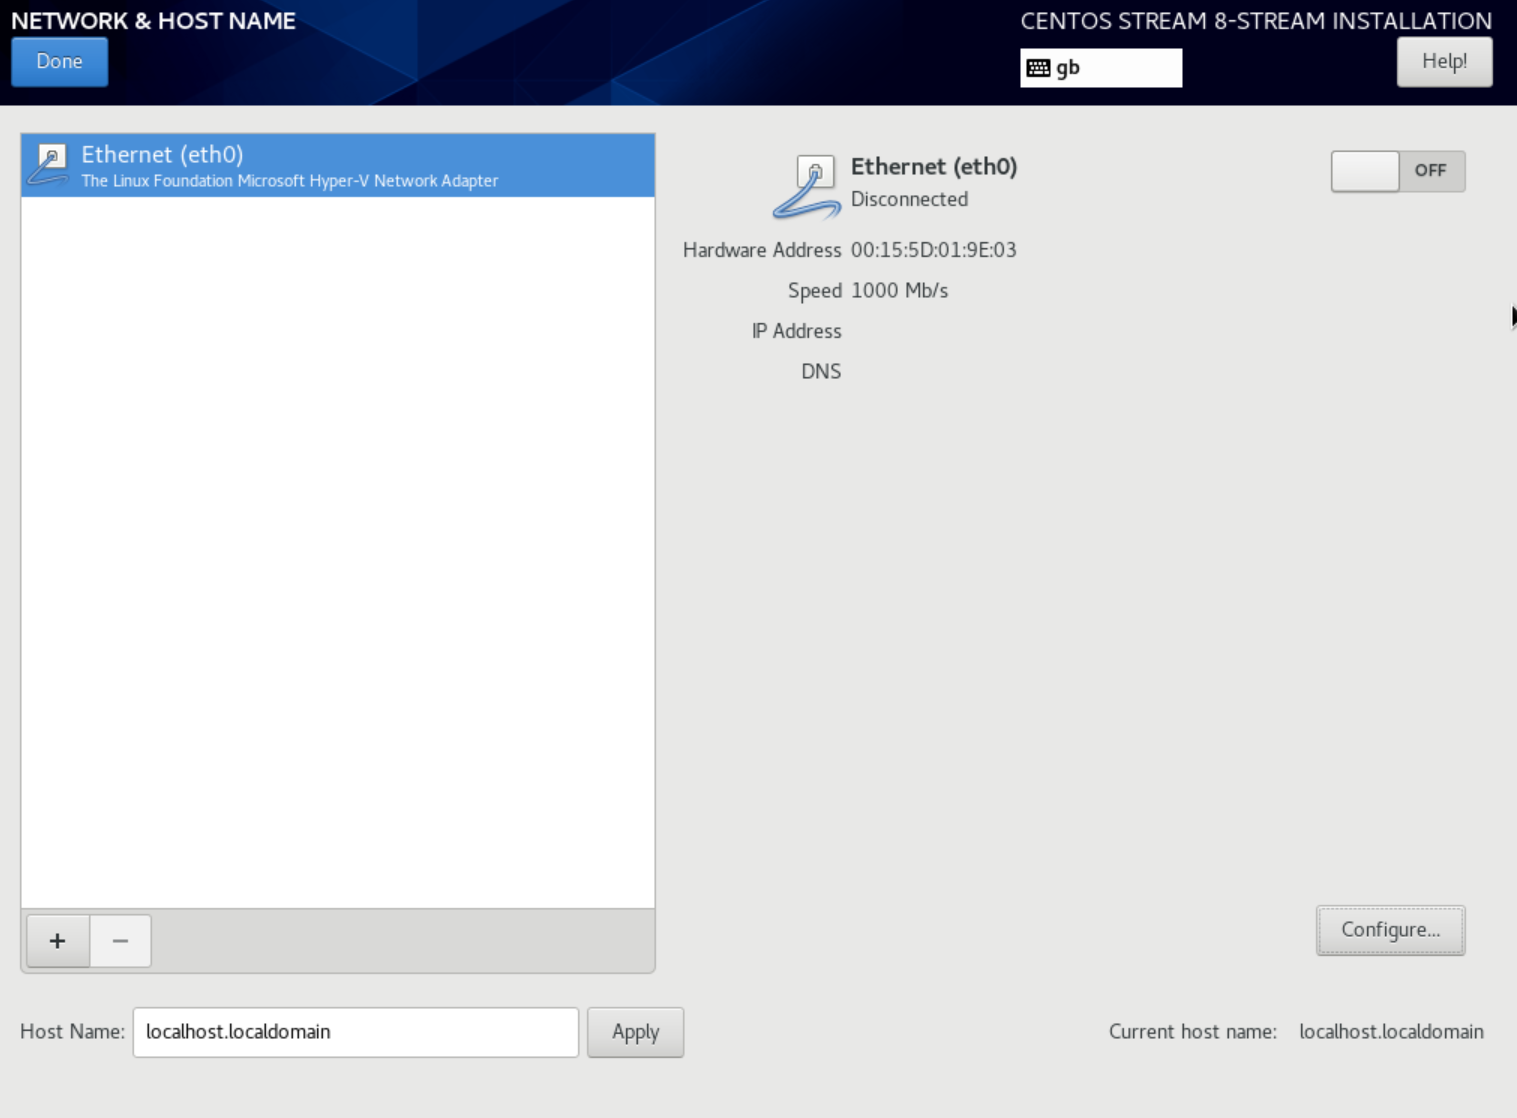
Here you can see any NICs you have attached to the VM. I am assuming you have only one and it is already connected to a network that has internet access. On this screen click configure.
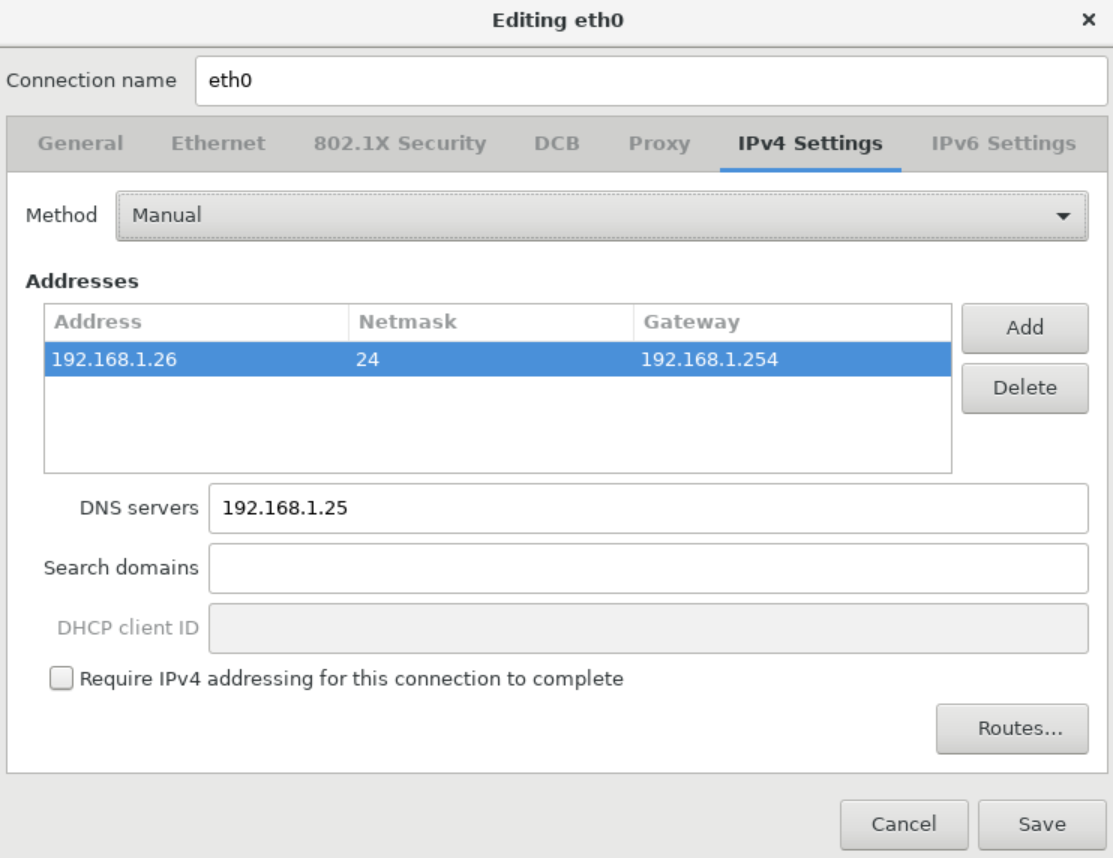
From here click add and enter valid network details and click save. (The netmask will accept CIDR notation if your fancy, or traditional lonf for (255.255.255.0 or whatever) if you prefer.
Now something that people often forget to do. Enable the NIC with this little button.
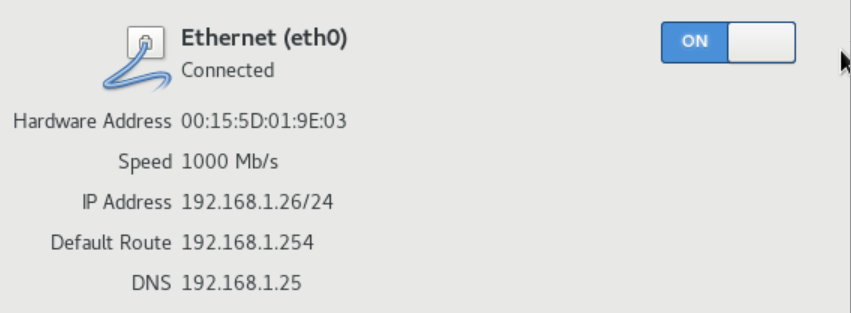
and finally click done.
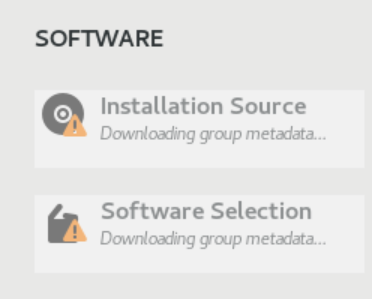
If you have entered valid network details you will now see the installation source begin to get the metadata for the available features for this install.
And once complete it will ask you to chose what features you wish to install
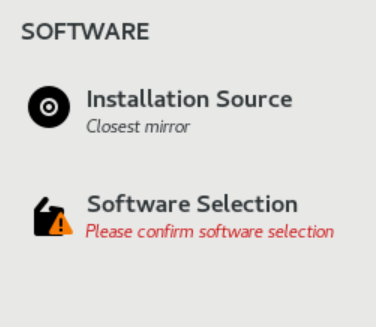
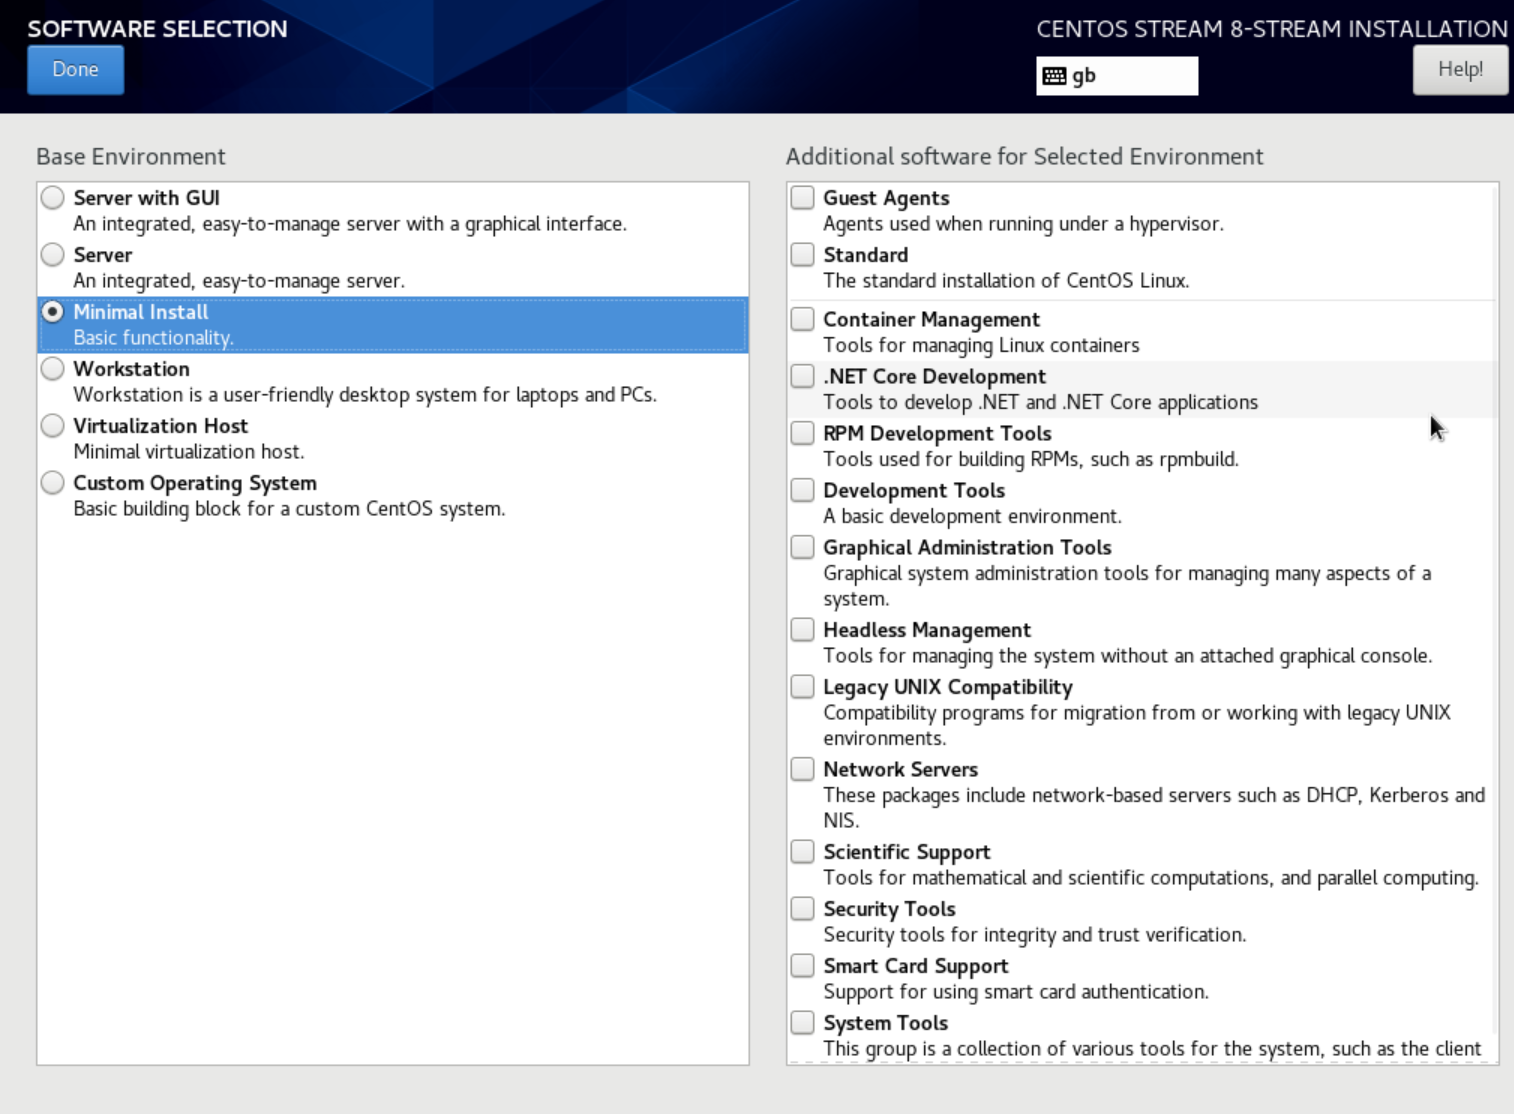
Click on Software selection. From here you can choose lots. Don't worry about this too much. Everything can be added later pretty easily. I tend to opt for a minimal install which is what I will do here.
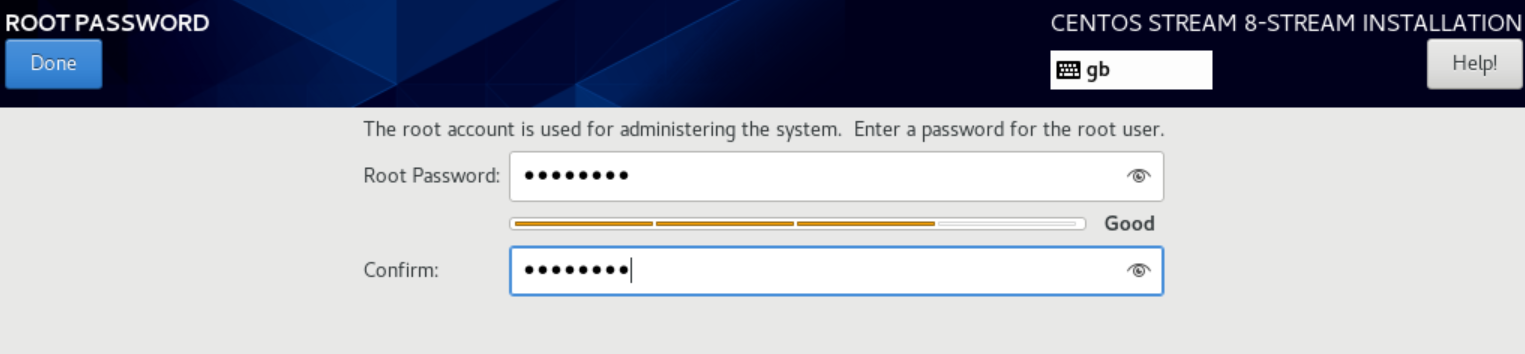
Once you have done this click on Root password and set something. This is an important password. You don't (or at least shouldn't) log in with this password but with it you have total administrator access (Called root access in fancy pants Linux land) to the VM. You can reset it but its a pain.
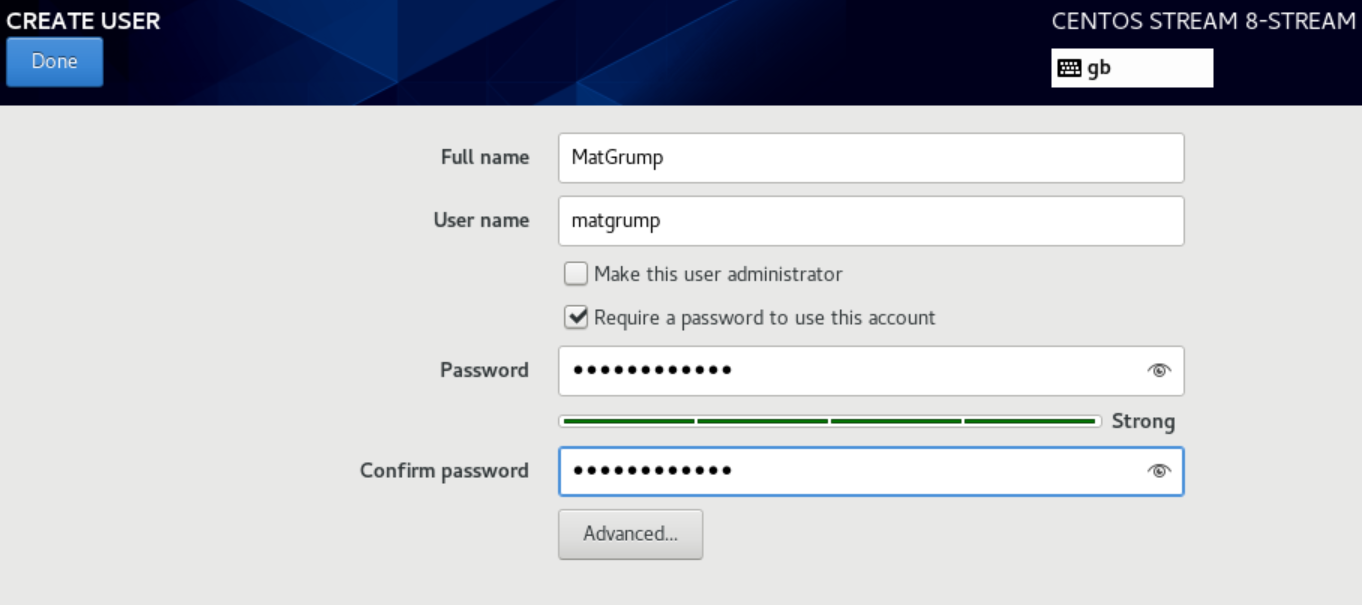
Finally we create a log on user. Remember that usernames are case sensitive in Linux world.
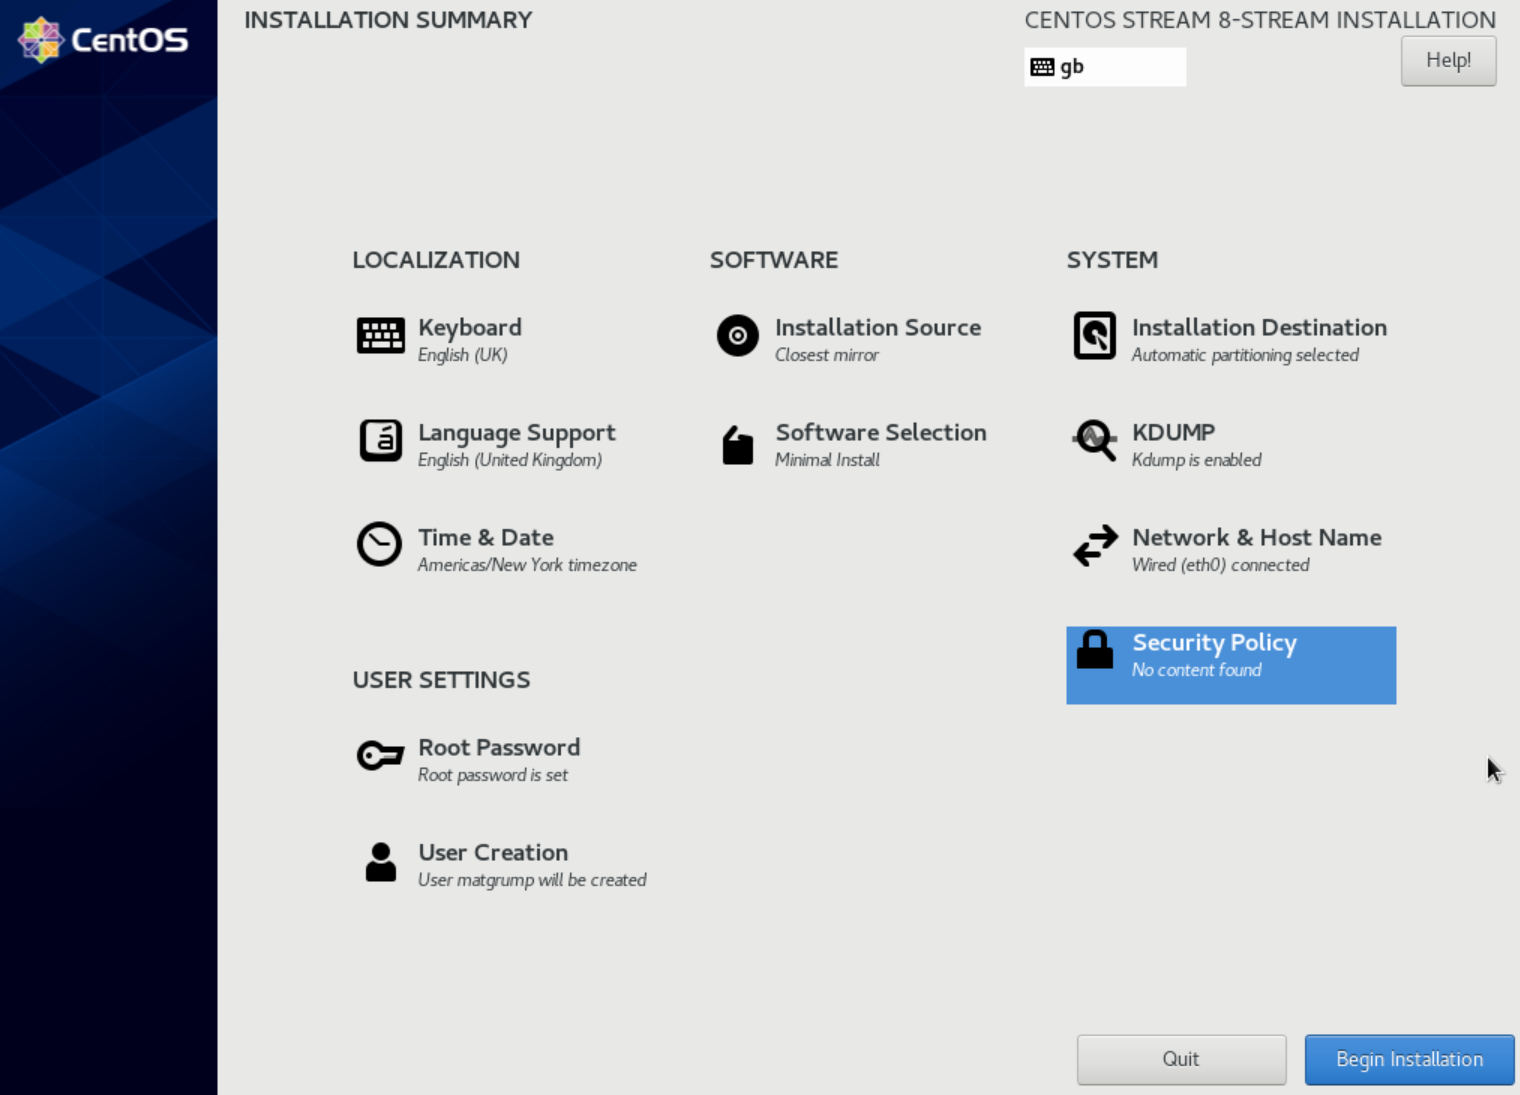
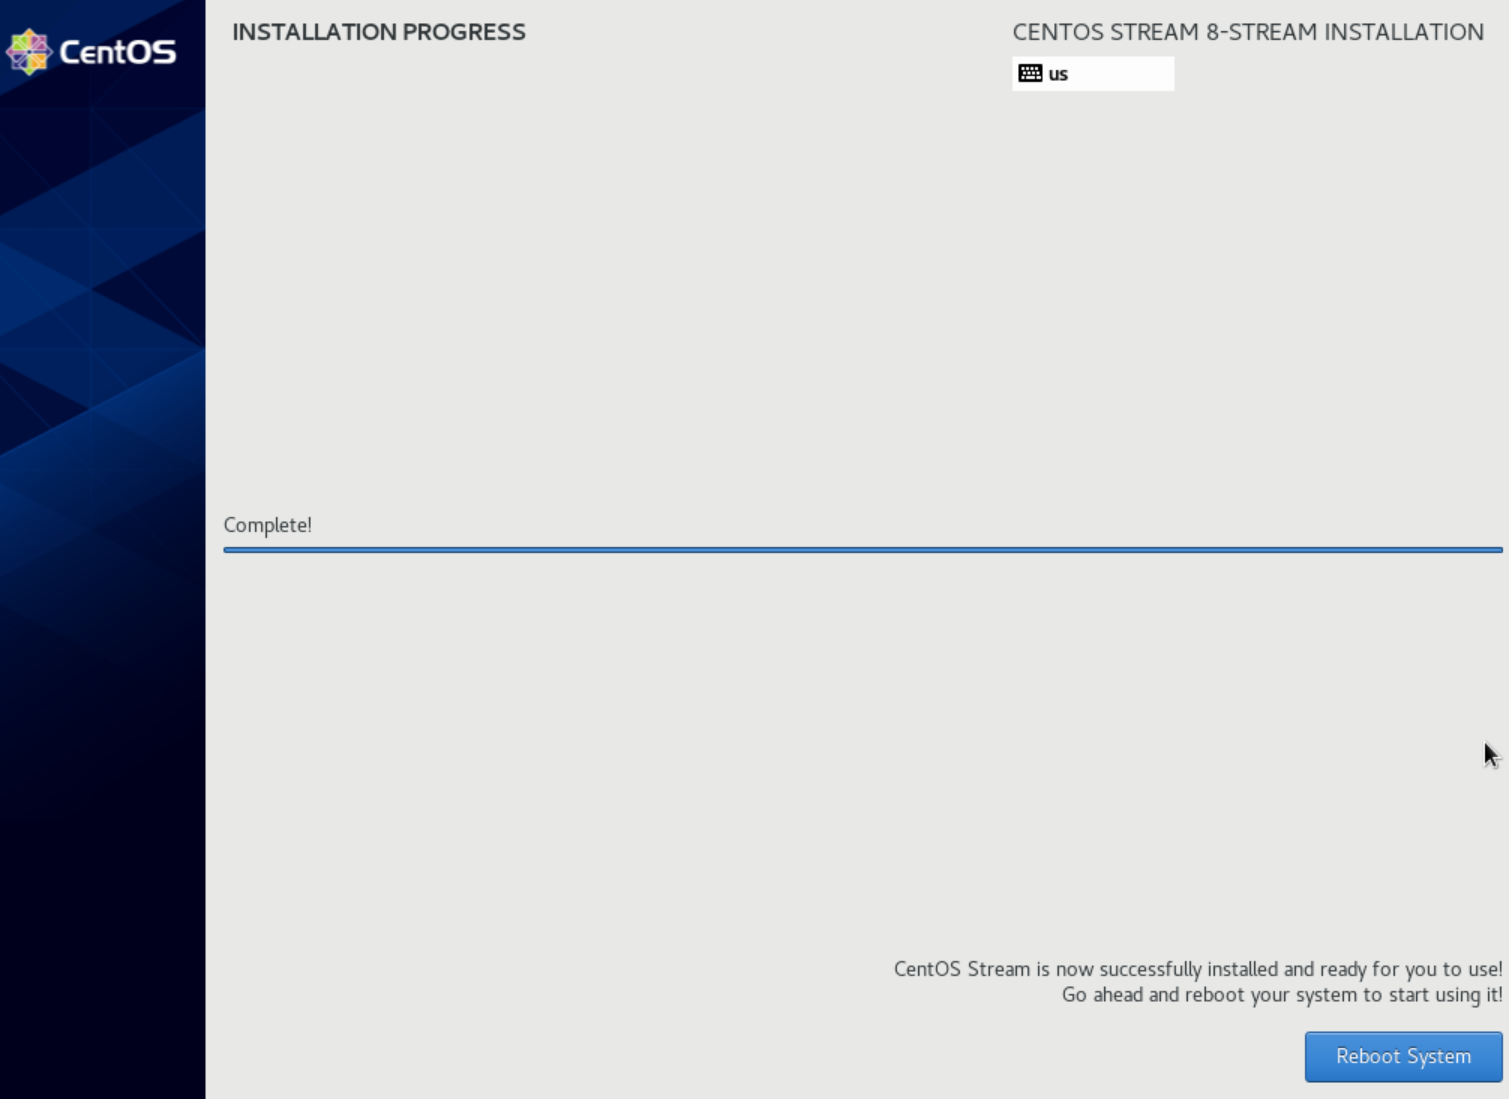
Now we can see every section should be happy and we can click 'Begin Installation'
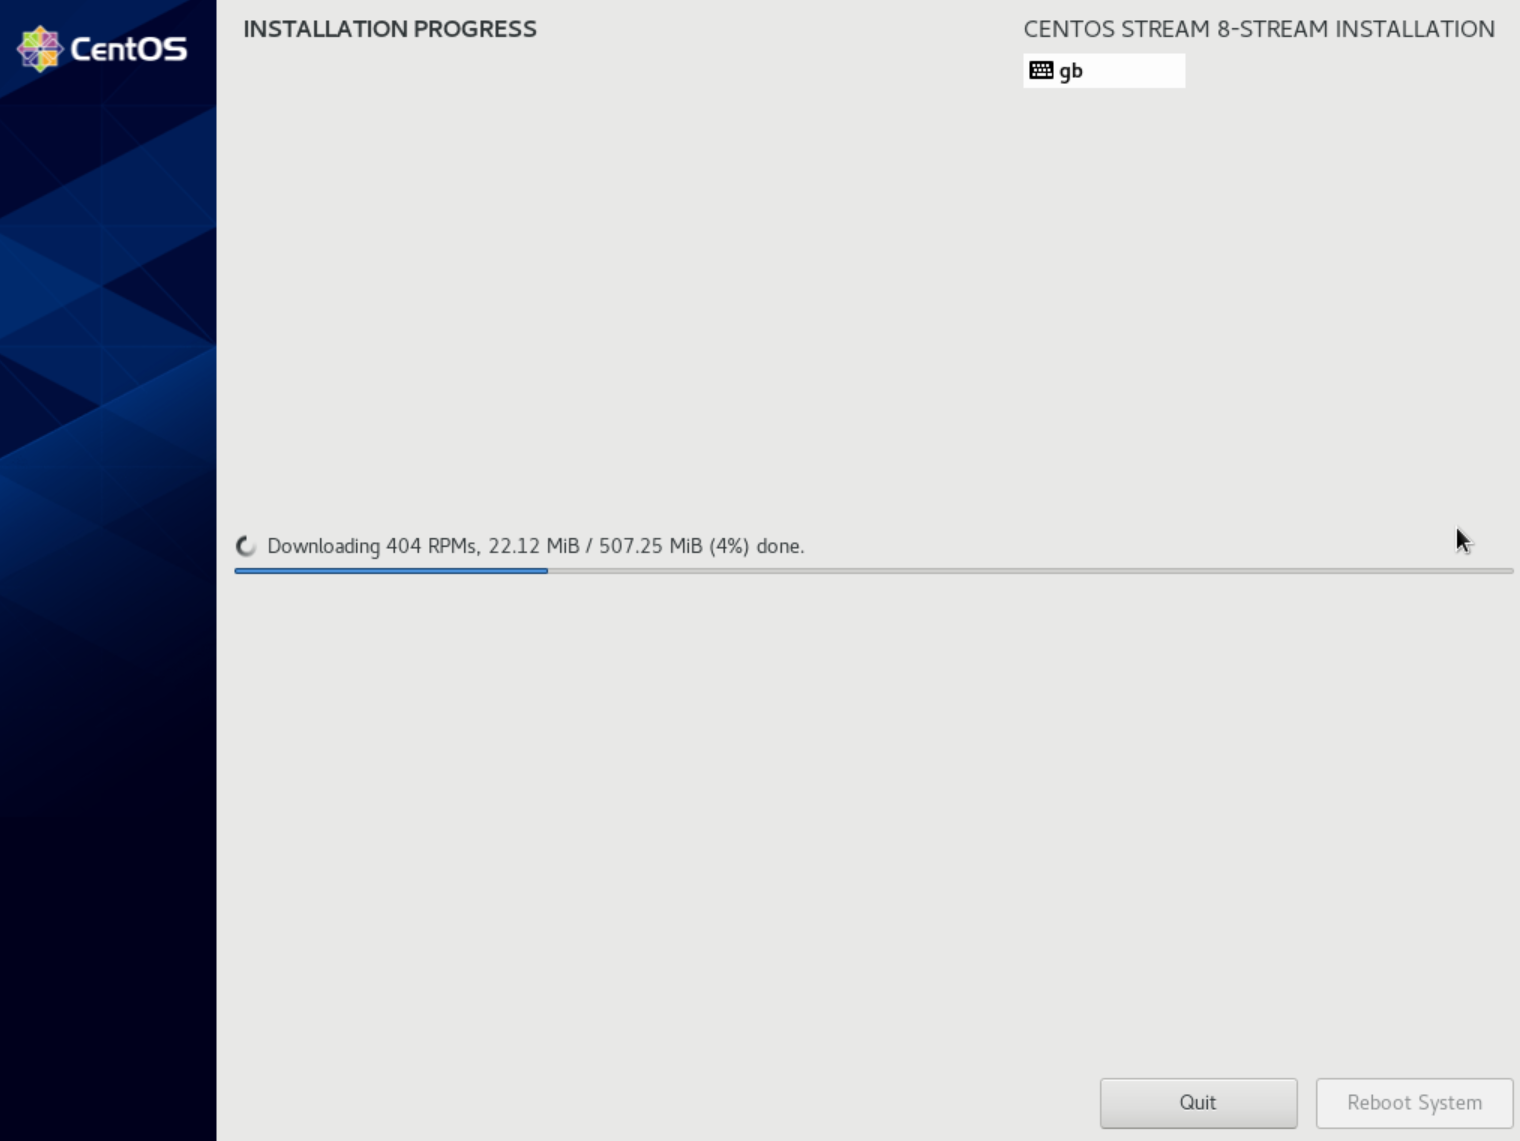
How long this next bit takes is dependant on what features you chose to install and what your internet is like
Once the installation is complete you will need to reboot the VM.
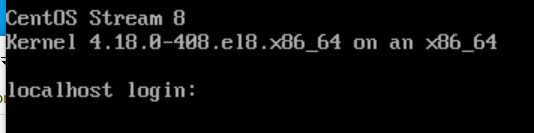
Once the VM is back up you will be presented with a log in screen.
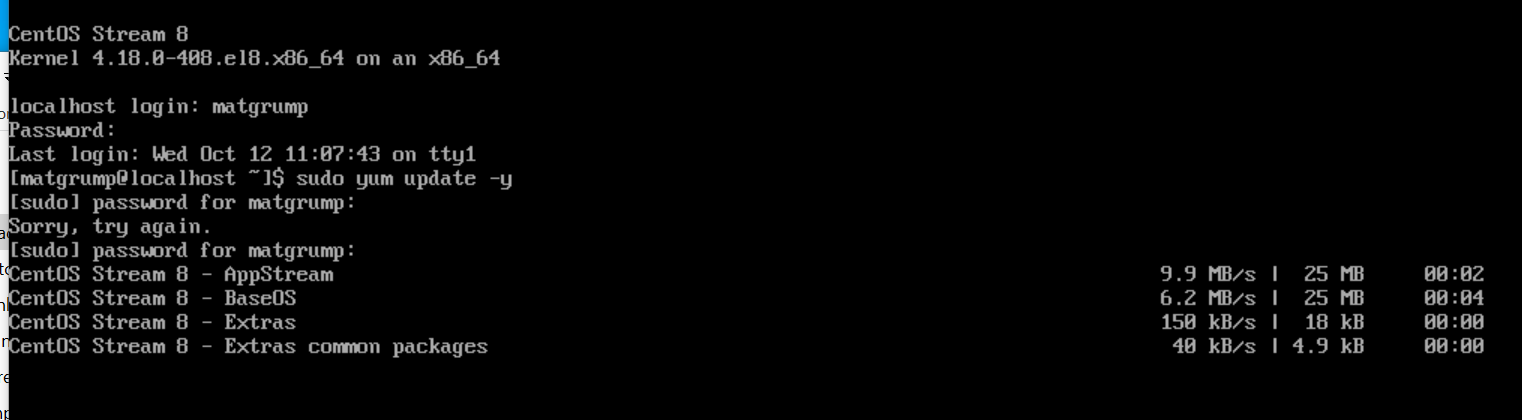
You should probably log into the VM and perform updates, to ensure you have the latest everything. Log in with the user you just created and run
sudo yum upgdate -ySudo - is how you elevate a command. When you run this you will be asked for your password again.
yum - stands for 'yellowdog updater modified' and is the pakage manager of choice for Centos. Seriously that's what it means. Welcome to Linux everyone.
update - well speaks for itself
-y - just automatically answers any questions with yes
The system will now update any modules that need it.
You can run this at anytime but beware. This can break applications.