Before you continue please consider clicking on one of the horrible ads. I know they are a pain but they help me pay for the hosting of this site. It owes me a lot of money. Sob story over. If you use an Adblocker, that's totally fine. My children don't like food anyway.
Let me start by saying straight away that there are 2 steps to this. You need to do something on the server end and then something with the client. Don't just do the server bit then scream at it every time it doesn't work for the next 6 months like I did. It's not very productive.
The first step is to enable the feature on Office 365.
Step 1
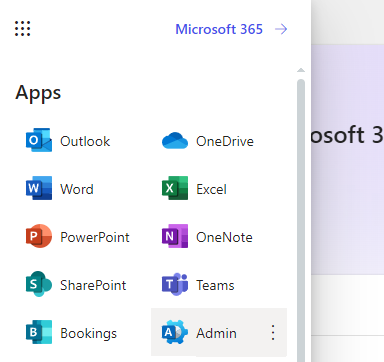
Log in to O365 and go to the admin console:
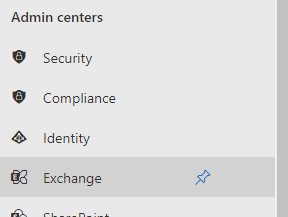
Now click on Exchange , under 'Admin Centers':
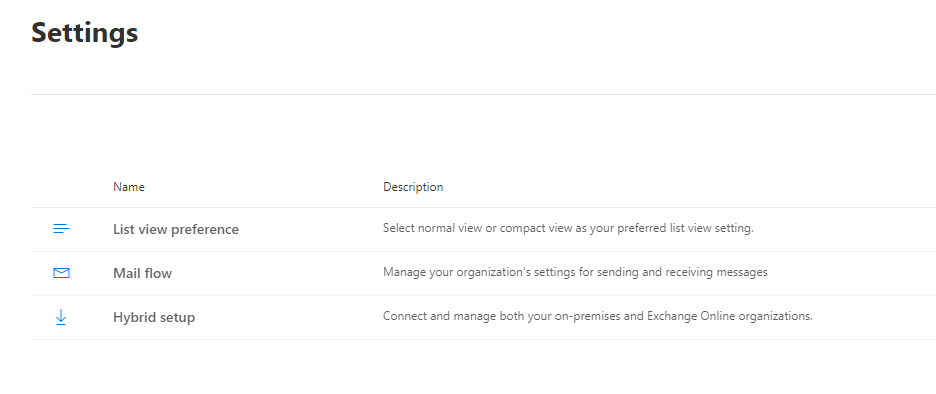
Now from here click on settings:

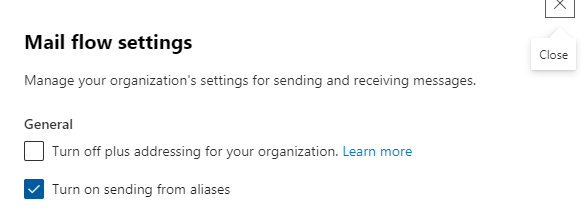
in the right pane you should see the setting 'Mail Flow', click on this.
Finally from the sliding pane that appears on the right tick the box that says 'Turn on sending from aliases'
Step 2
Next we need to configure the client. I previously skipped this bit in favour of repeated and frequent frustration. I wouldn't recommend that.
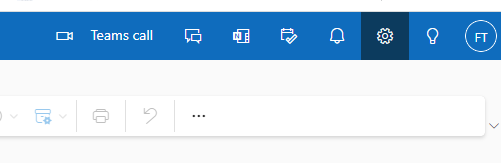
Log into the web email client. In the top right of the screen there is a little cog. Click this.
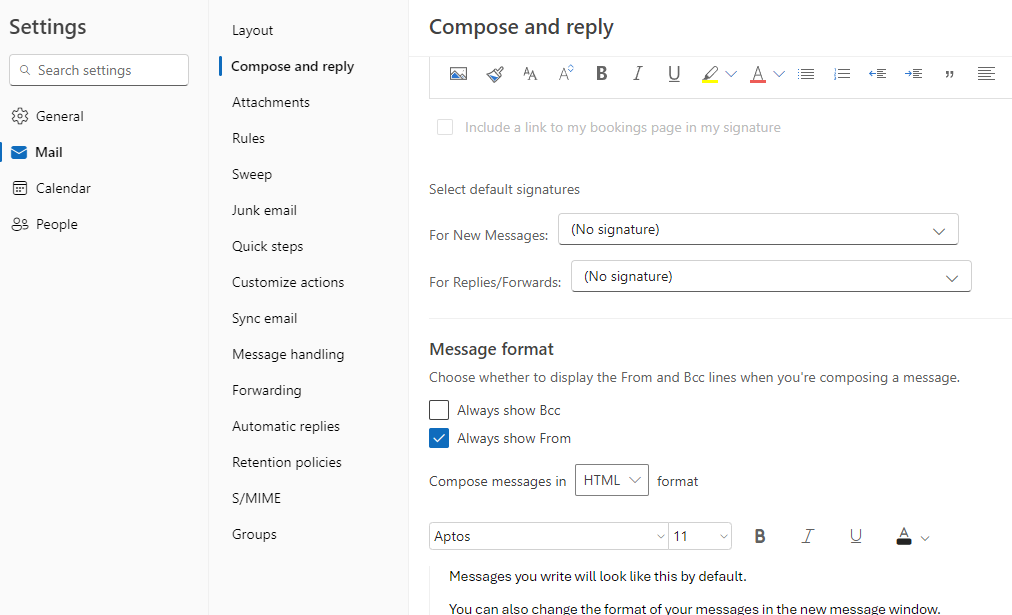
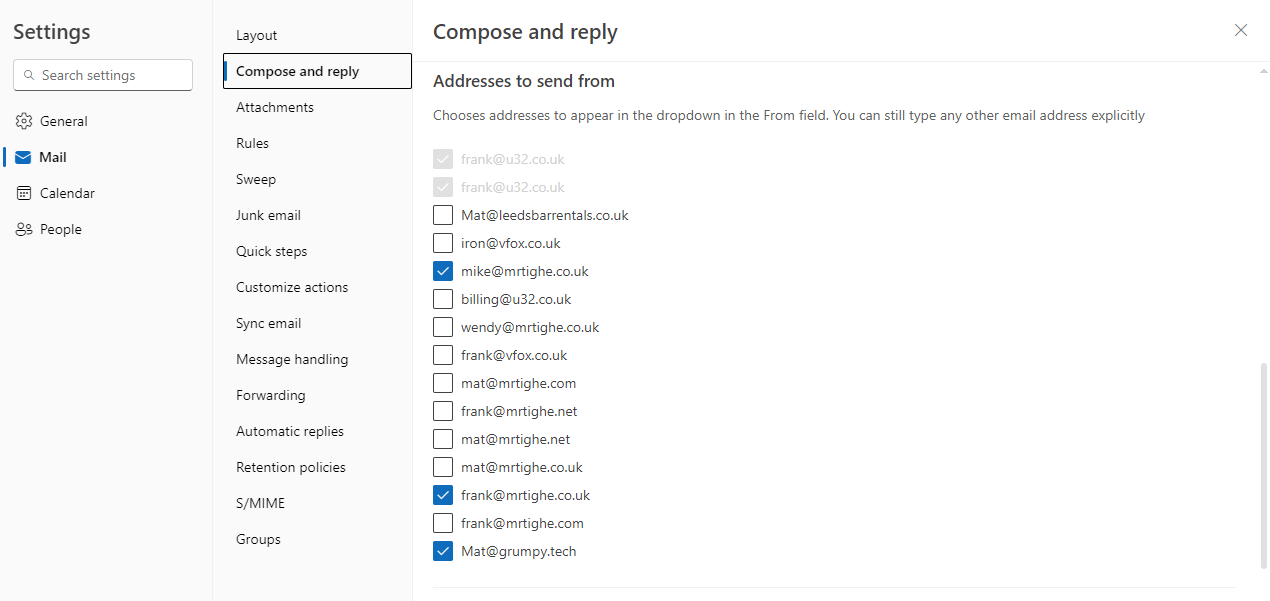
This will bring up the settings for OWA. Click on 'Compose and reply'.
Scroll down slightly, until you see the options for 'Message Format'. Click 'Always show From'. This will make sure you can see the 'From' field when composing an email.
Now scroll down further and you should see a list of all the alias you the logged in user has at their disposal. Tick the ones you want to be able to use
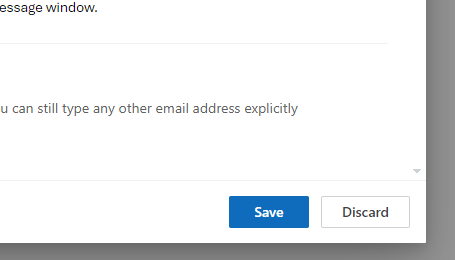
Make sure you hit save at the bottom of the screen
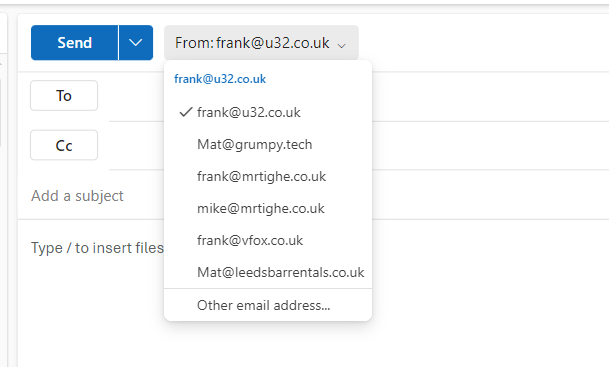
Now all the pieces are in place. Click on new mail and note the drop box next to the 'From' field. Click on this and Voilà!